


Turn Forms Into Automated Workflows
Design dynamic forms, streamline operations, and eliminate repetitive manual tasks — all without code.
Talk to Our ExpertsBuild Smarter Forms Faster
Create no-code forms inside Salesforce and automate data collection, approvals, and workflows without complexity.
Get StartedSimplify Your Form Workflows
Replace manual processes with intelligent forms that capture, route, and manage data seamlessly in Salesforce.
Book a DemoWhen creating a form in Salesforce, presentation matters just as much as functionality. A clear and well-structured header helps users immediately understand the purpose of the Salesforce form, also improves its readability, and enhances the user experience. Without a proper heading, even a well-designed form can look incomplete and confusing.
Thus, if you are using forms builder like Forms Made Easy inside Salesforce forms, adding and managing headers becomes very easy. We will guide you step by step so you can create a clean, properly structured form without any confusion.
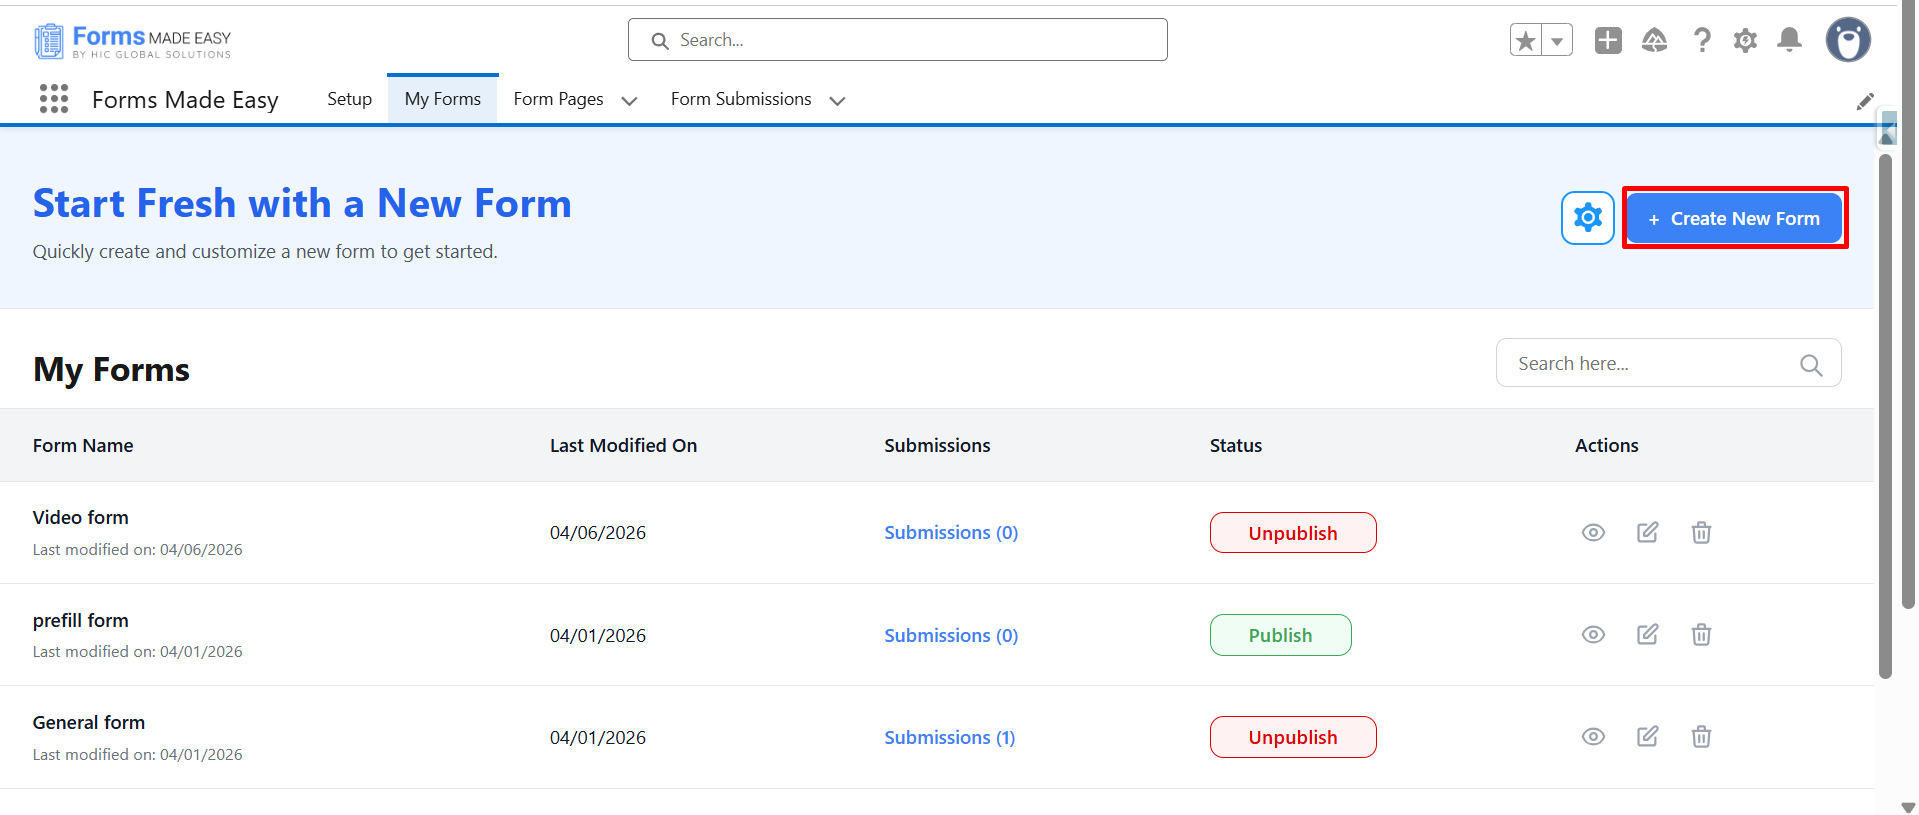
Step 1: So first, you need to log in to your account and then go to the My Forms tab. From there, click on the “Create New Form” button to start creating your form.
Step 2: Enter the form name and select the form type (Salesforce Objects or General Fields). So here I have selected the General Fields option based on my requirement.
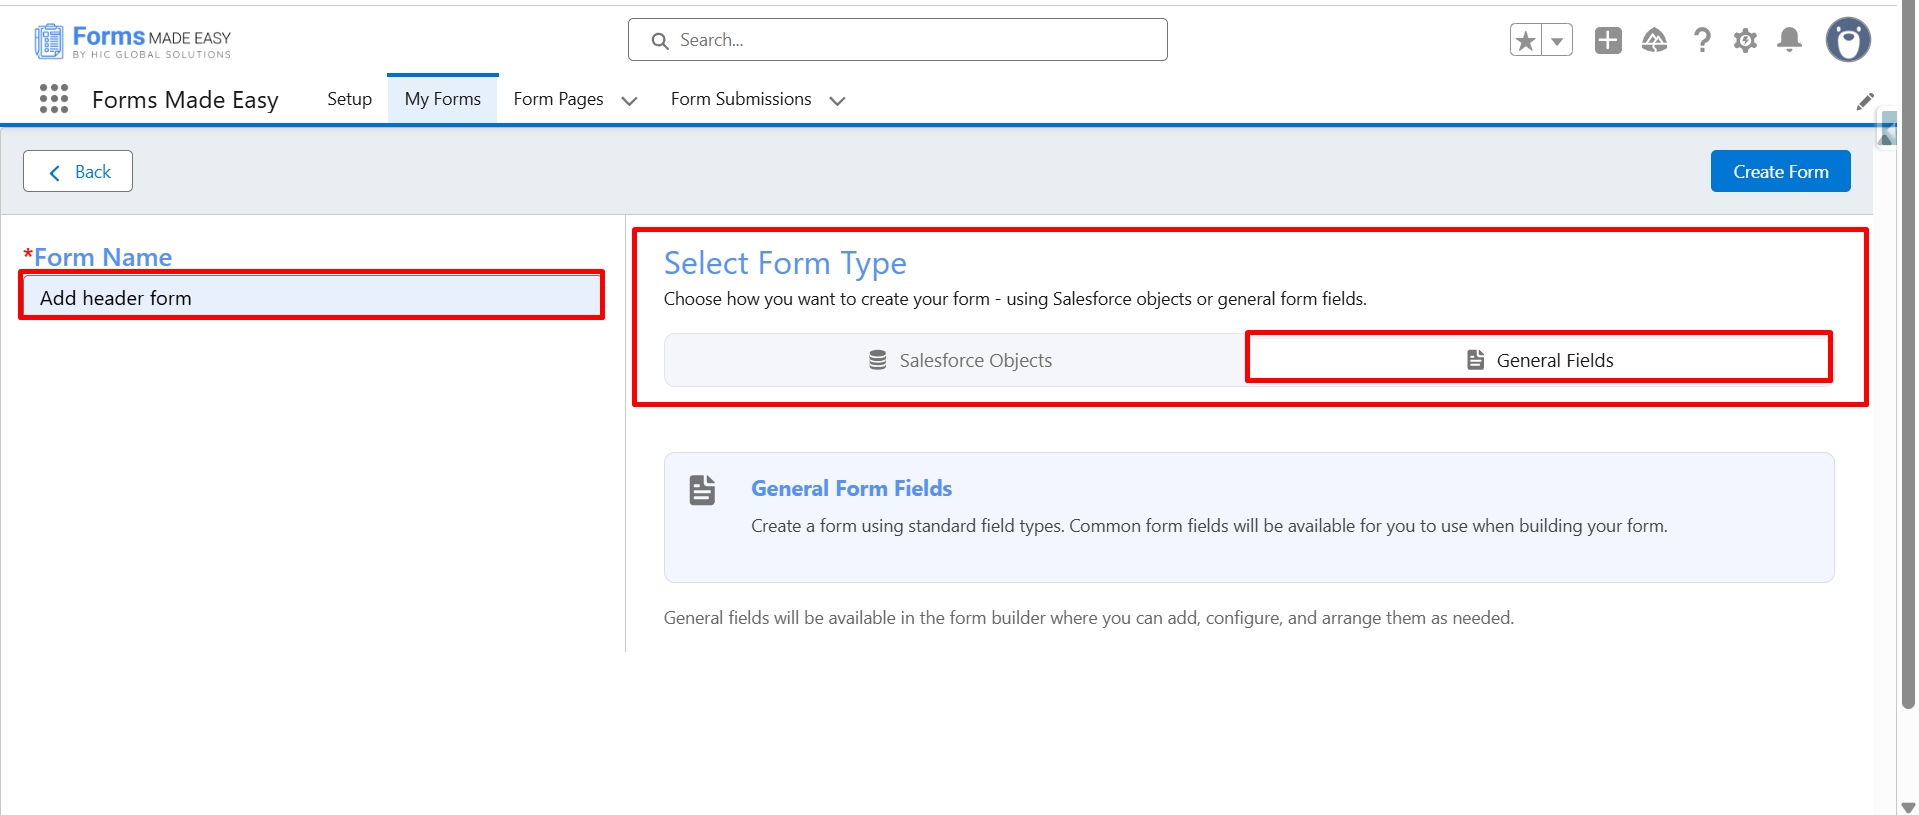
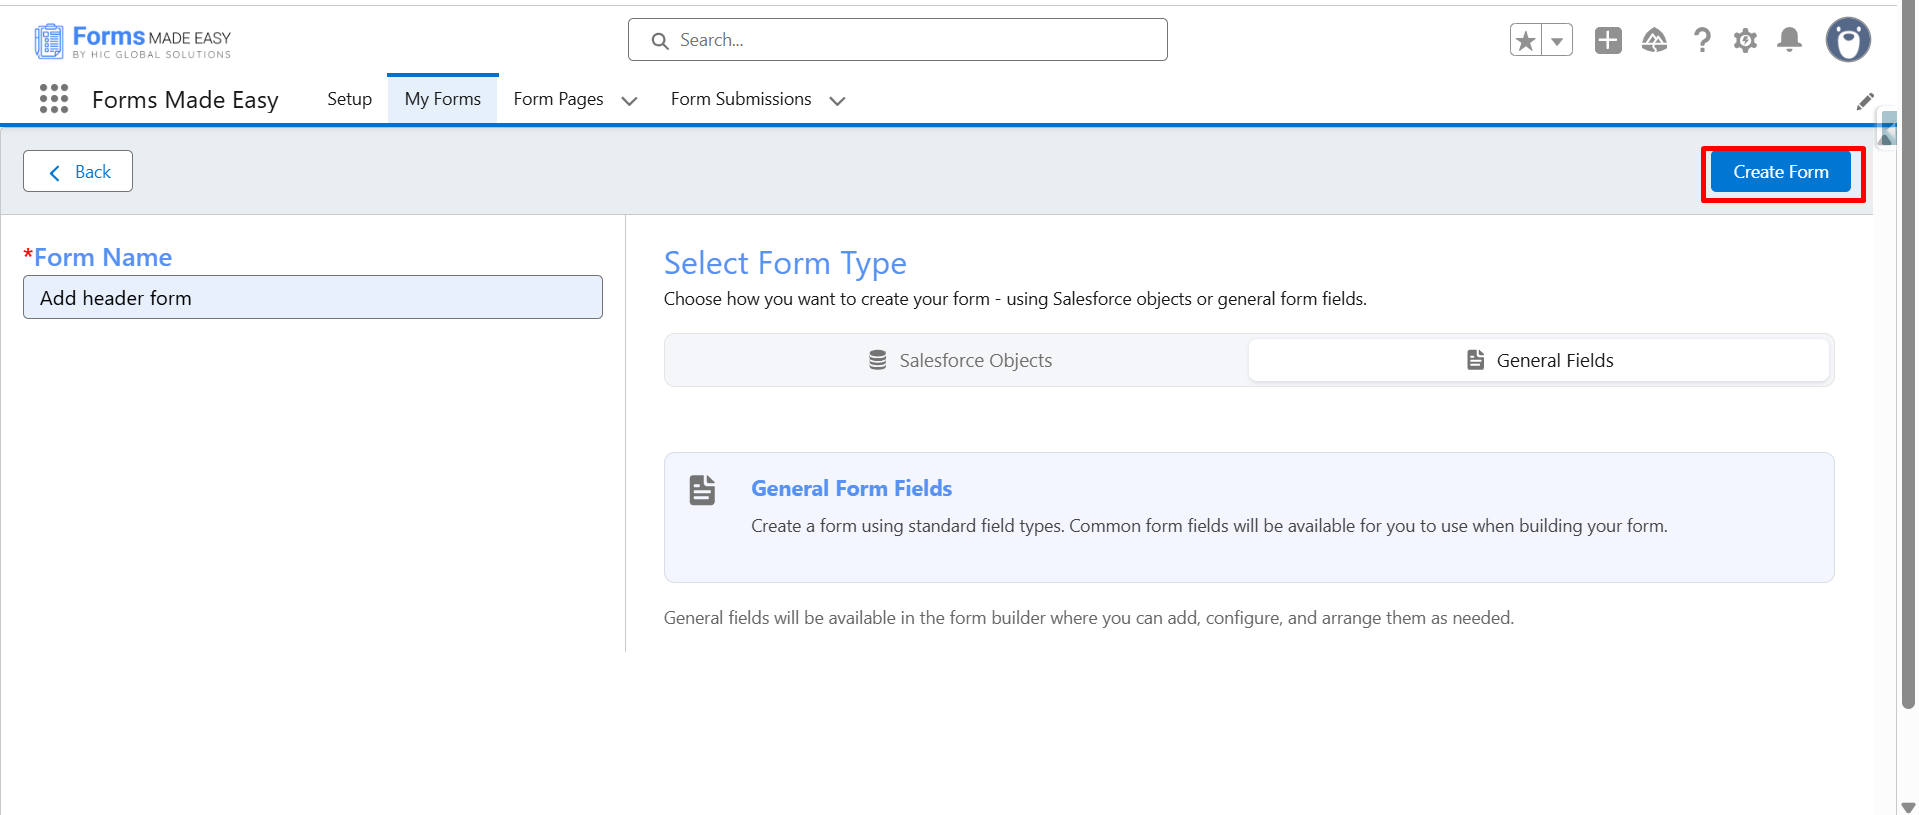
Step 3: Now click on the “Create Form” button to proceed further.
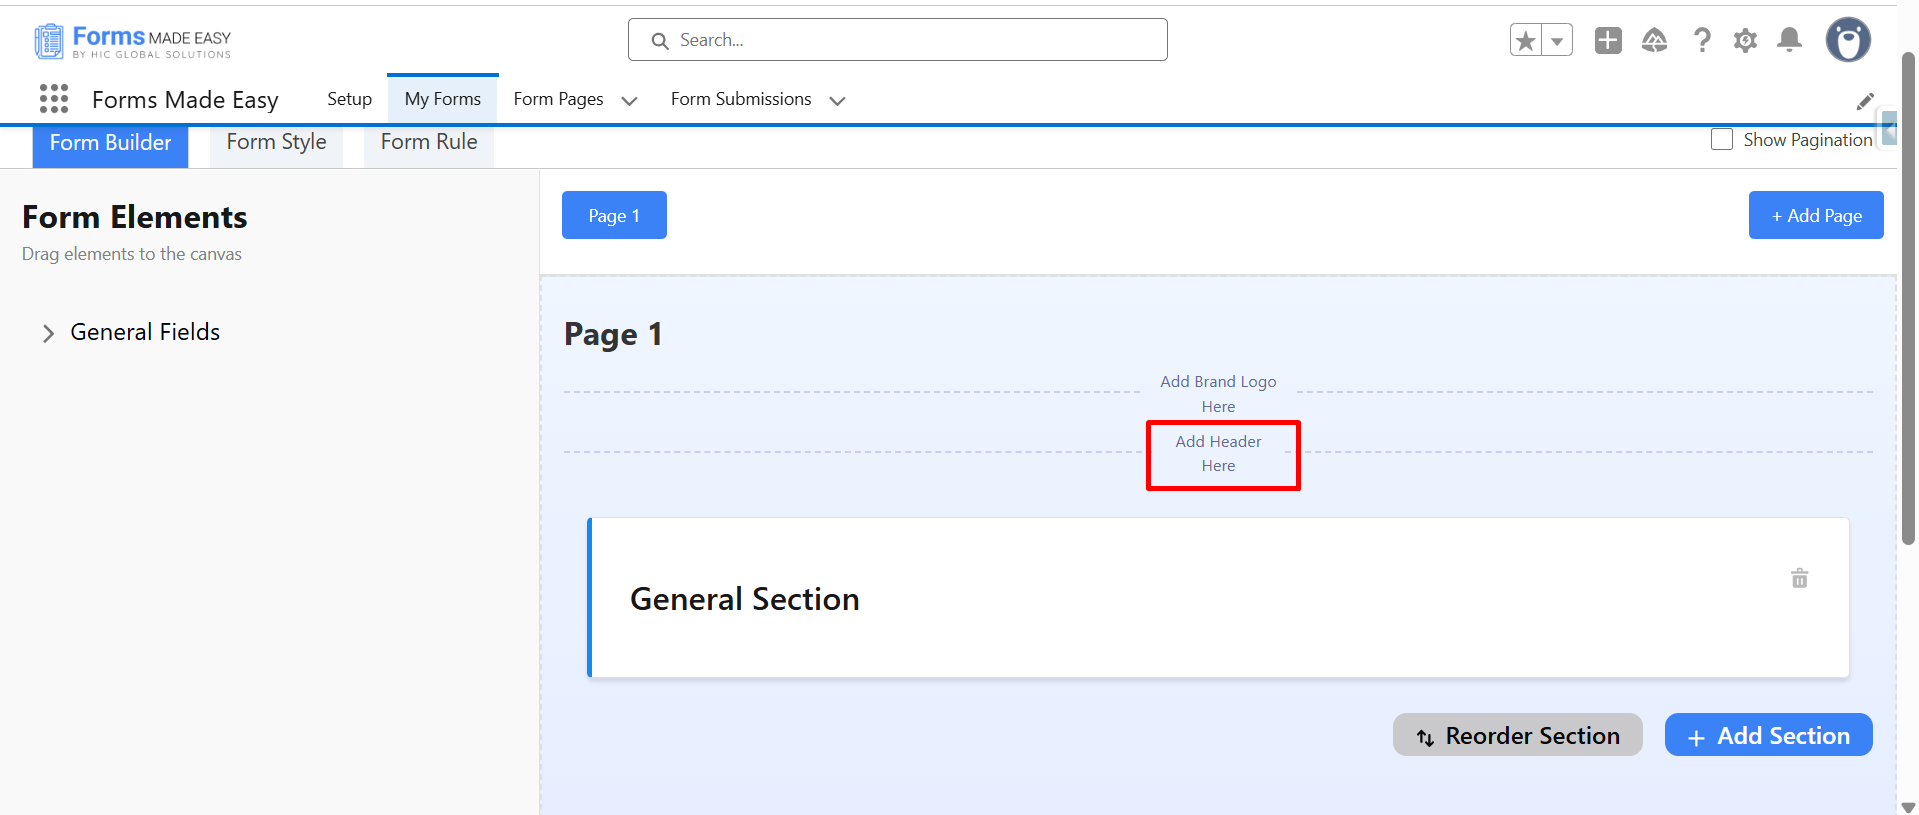
Step 4: To add a header, click on “Add header Here” which appears at the top of the form layout.
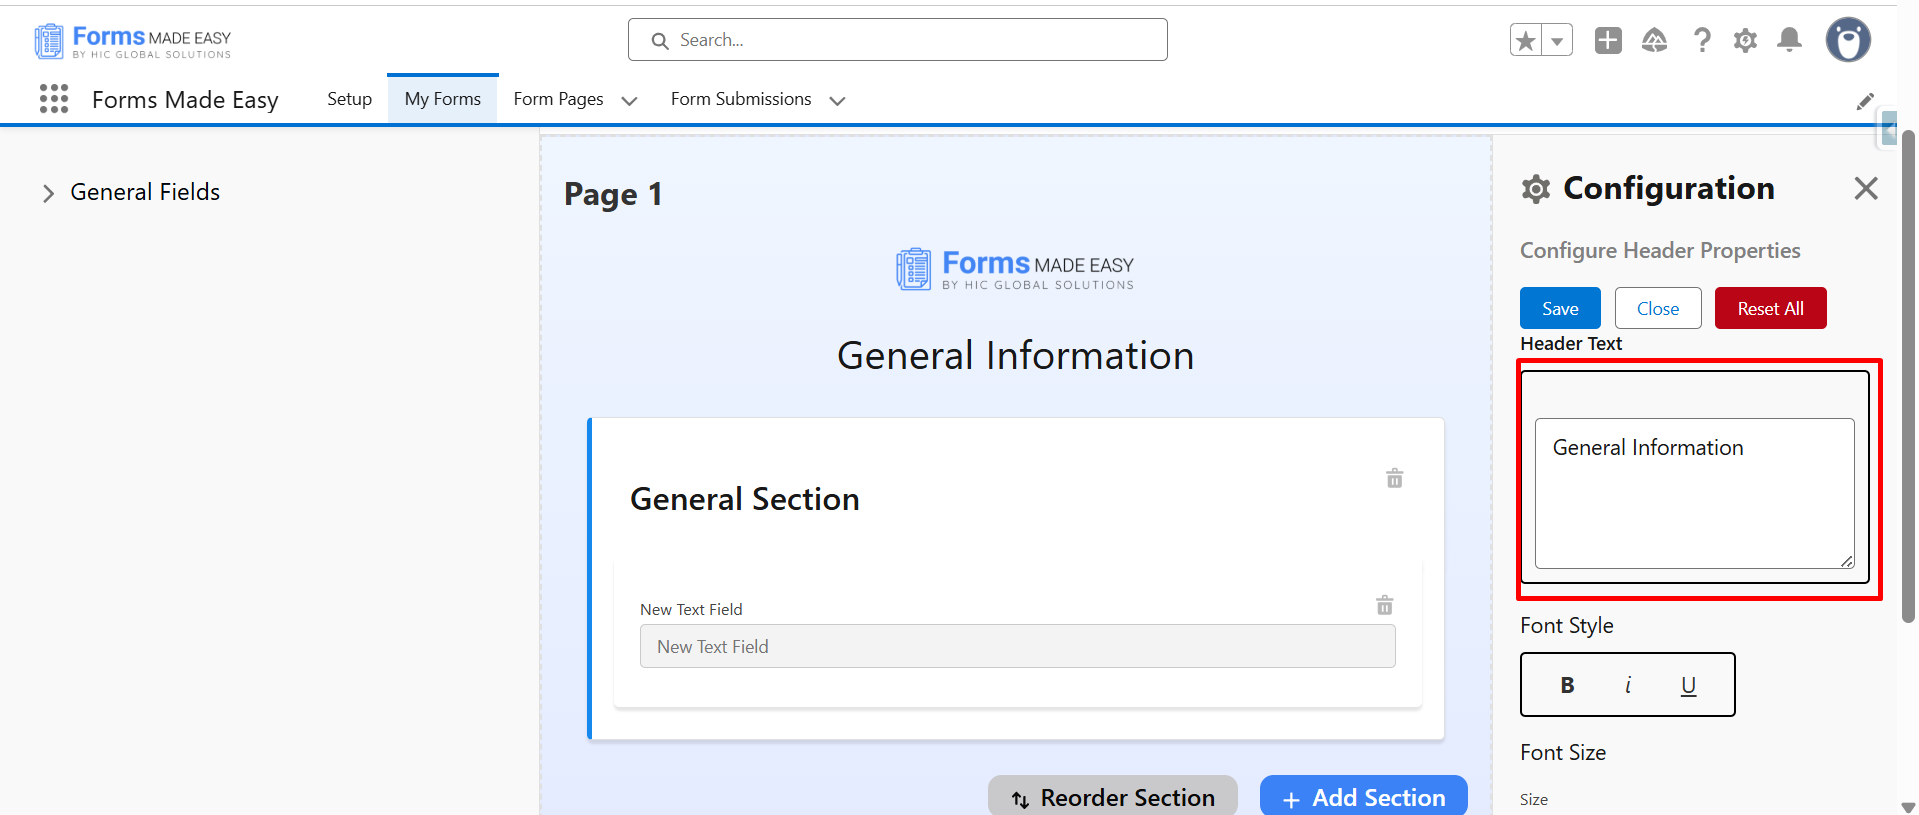
Step 5: Now, a configuration side panel will open on the side. Locate the Header Text field and enter the header content that you want to display on your form.
Step 6: If required, you can adjust the font size and font style from the available options. For alignment, click on Position and select left, center, or right as per your design preference.
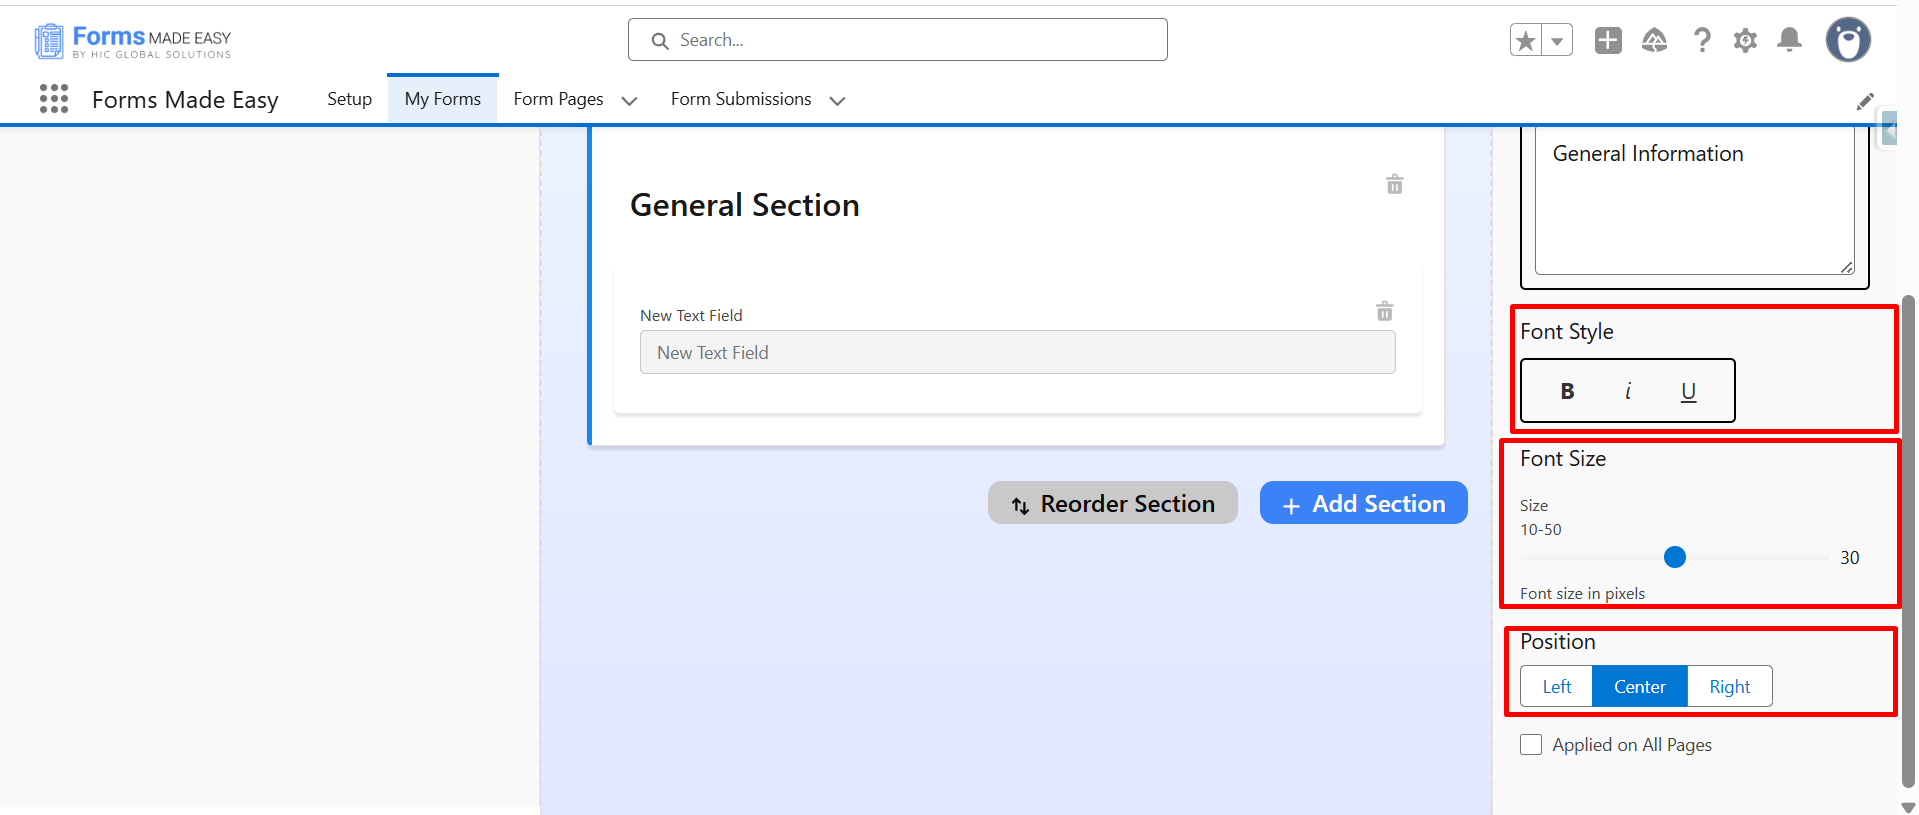
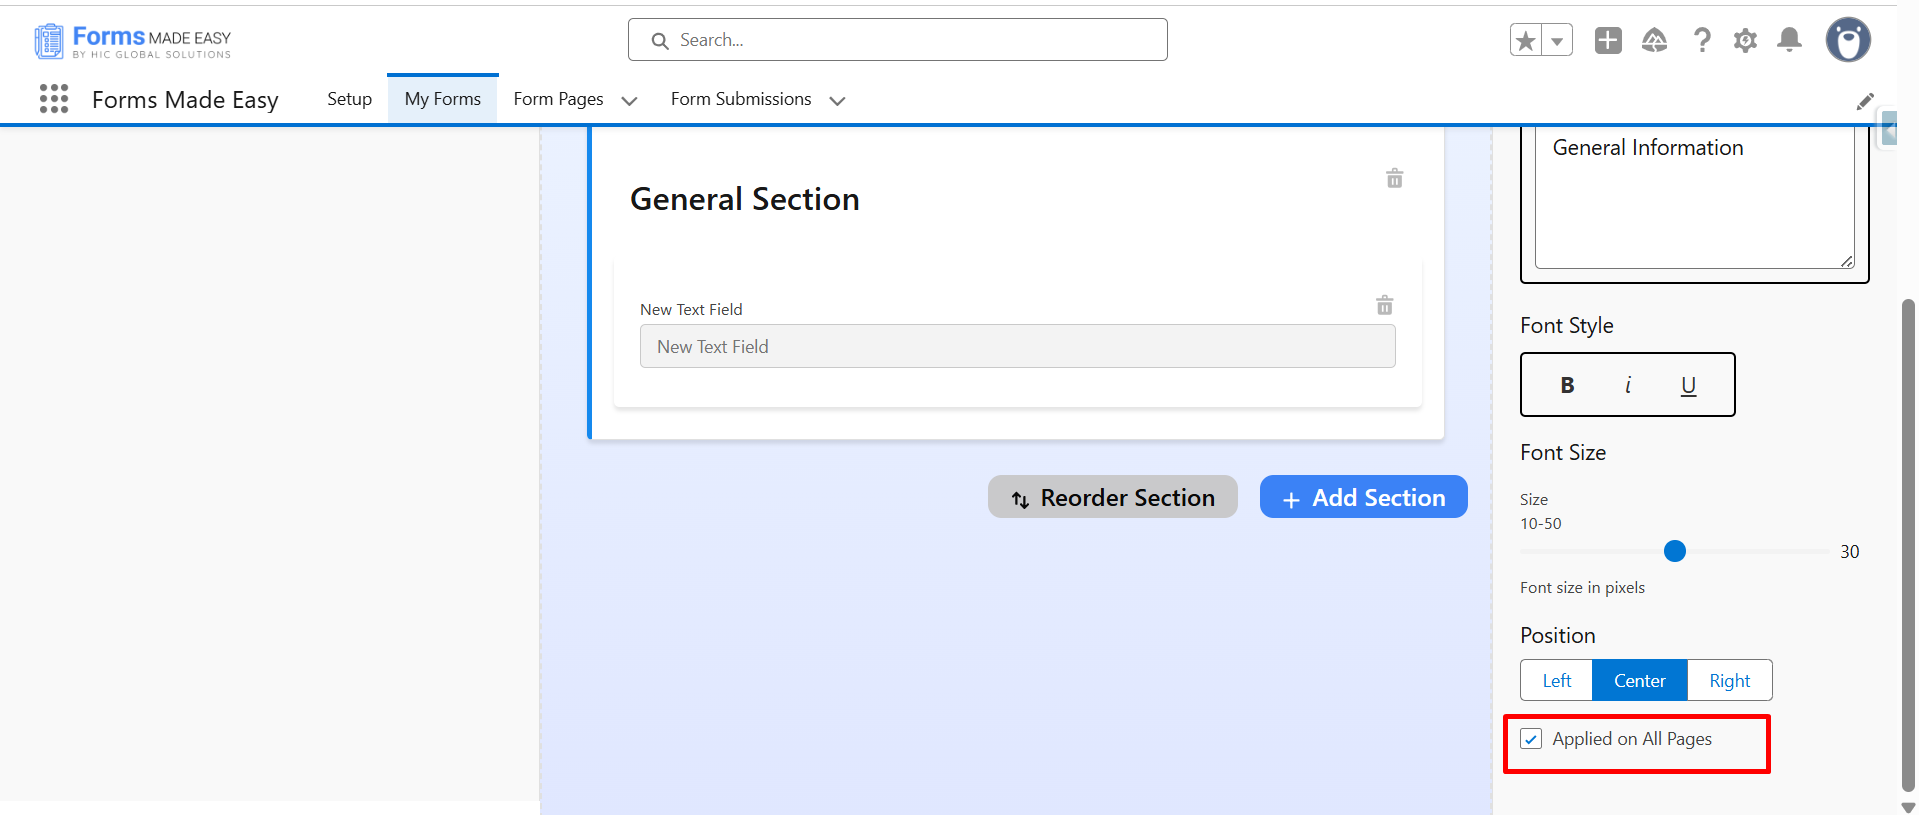
Step 7: If you are creating a multi-page form, enable Apply on All Pages so that the same header appears on every page of the form.
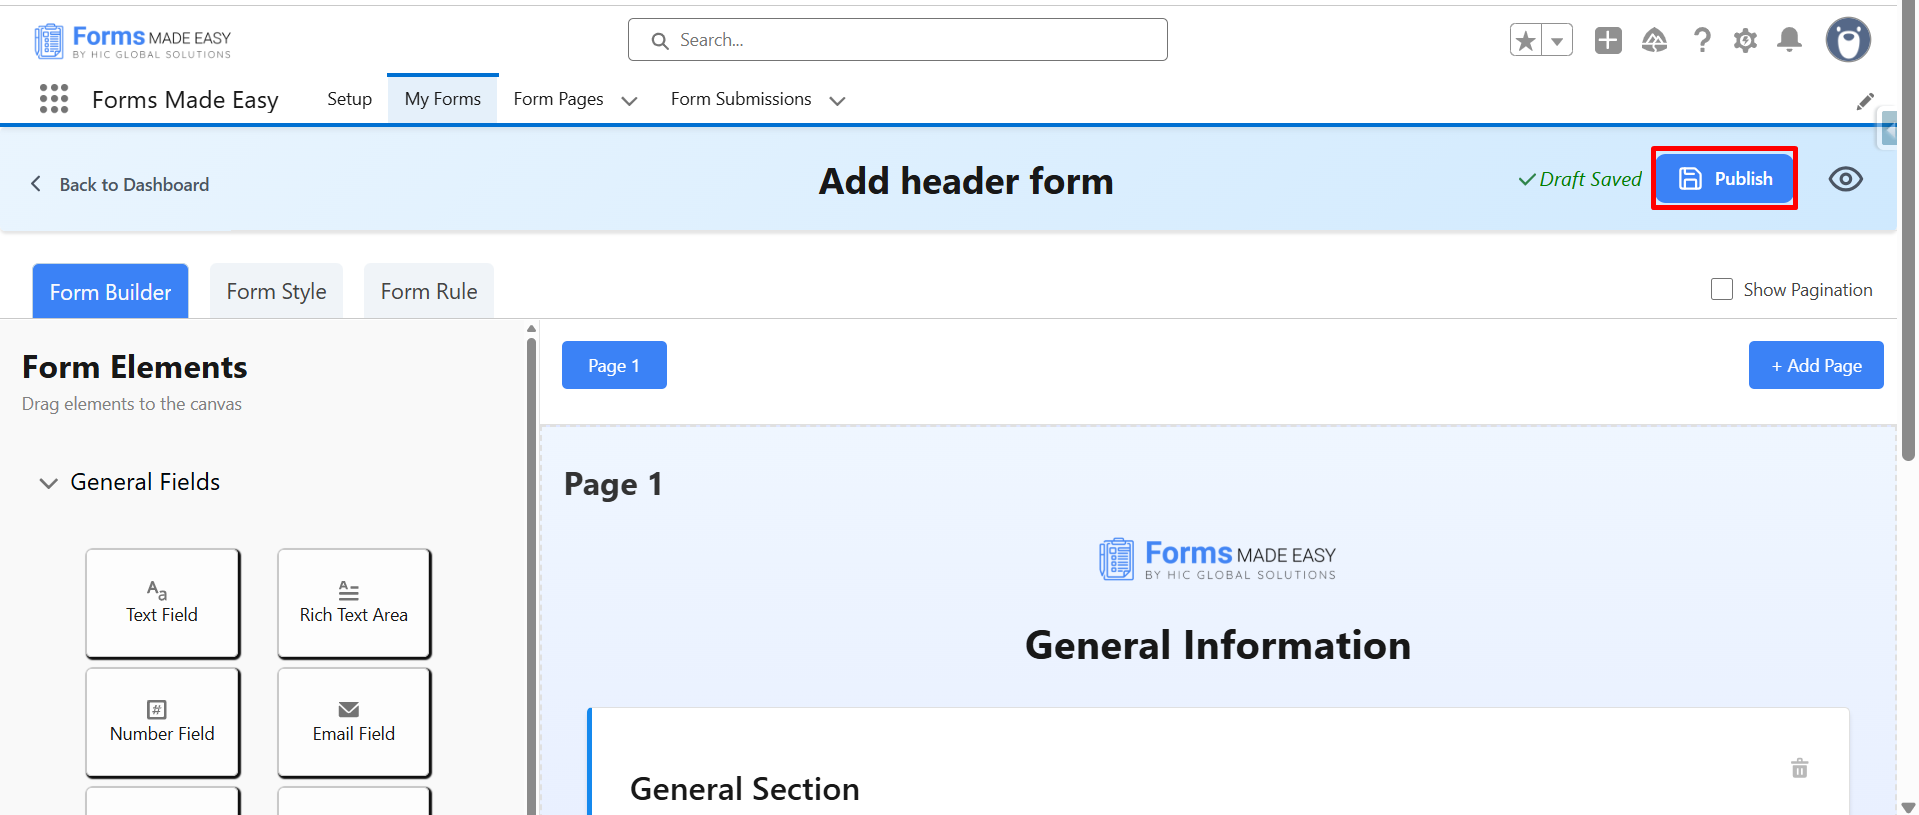
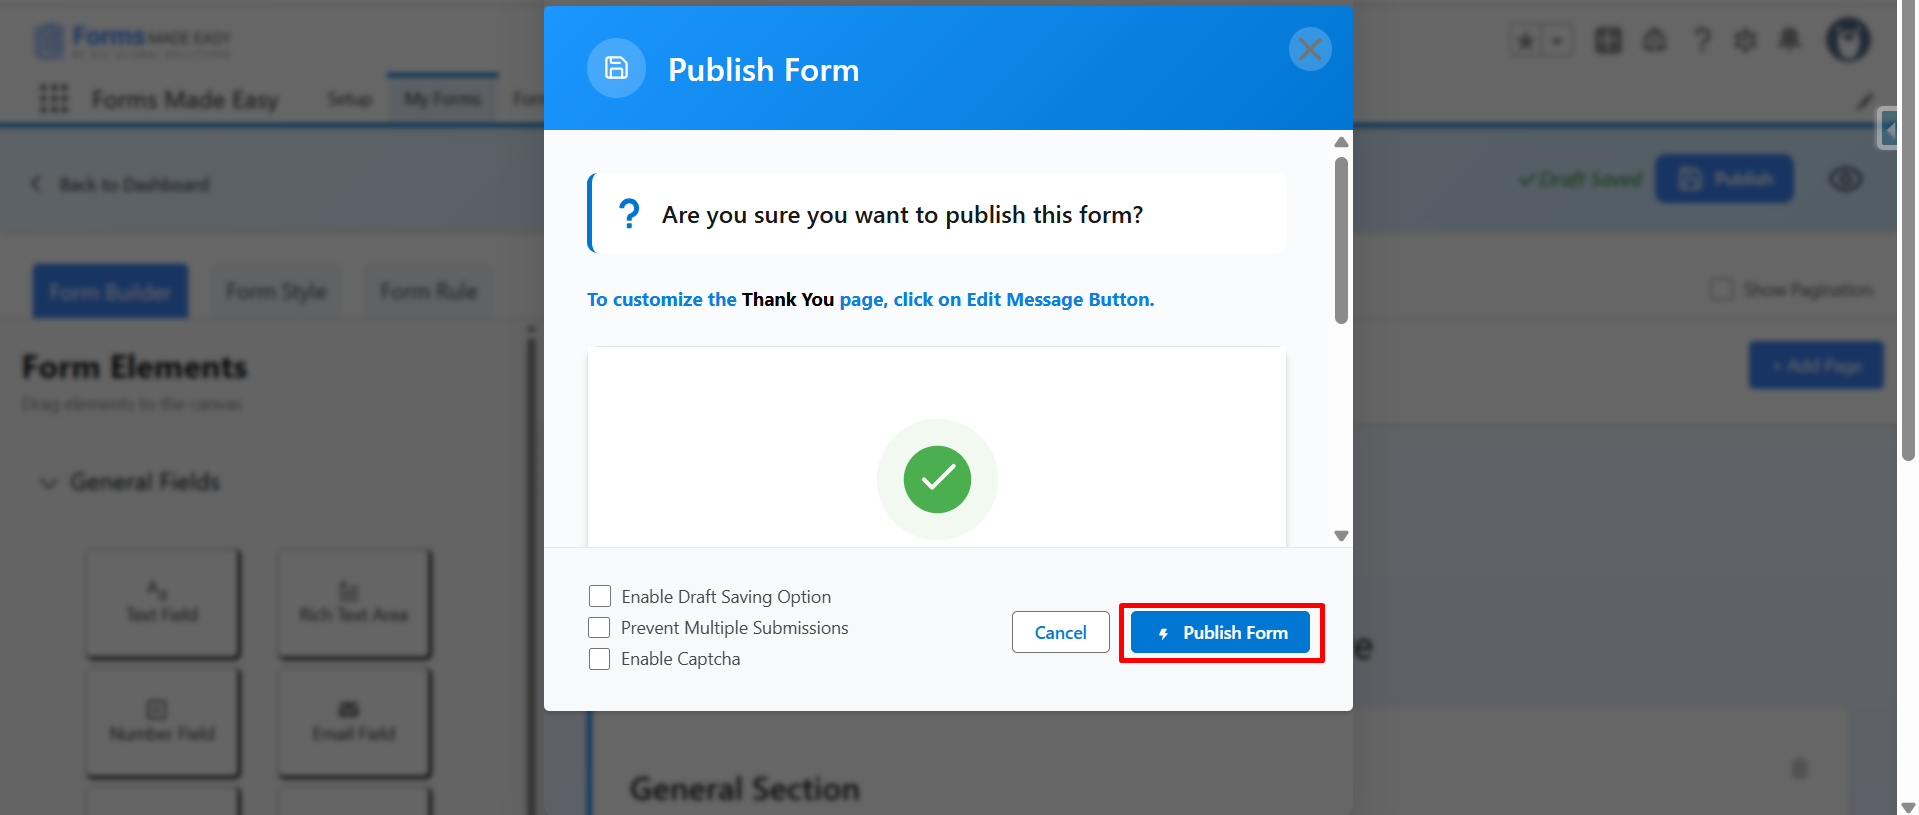
Step 8: Now drag and drop the required fields into the form layout according to your needs. After all of that, you can publish the form by clicking the Publish button.
Step 9: Click on the “Publish Form” button to confirm the publishing process.
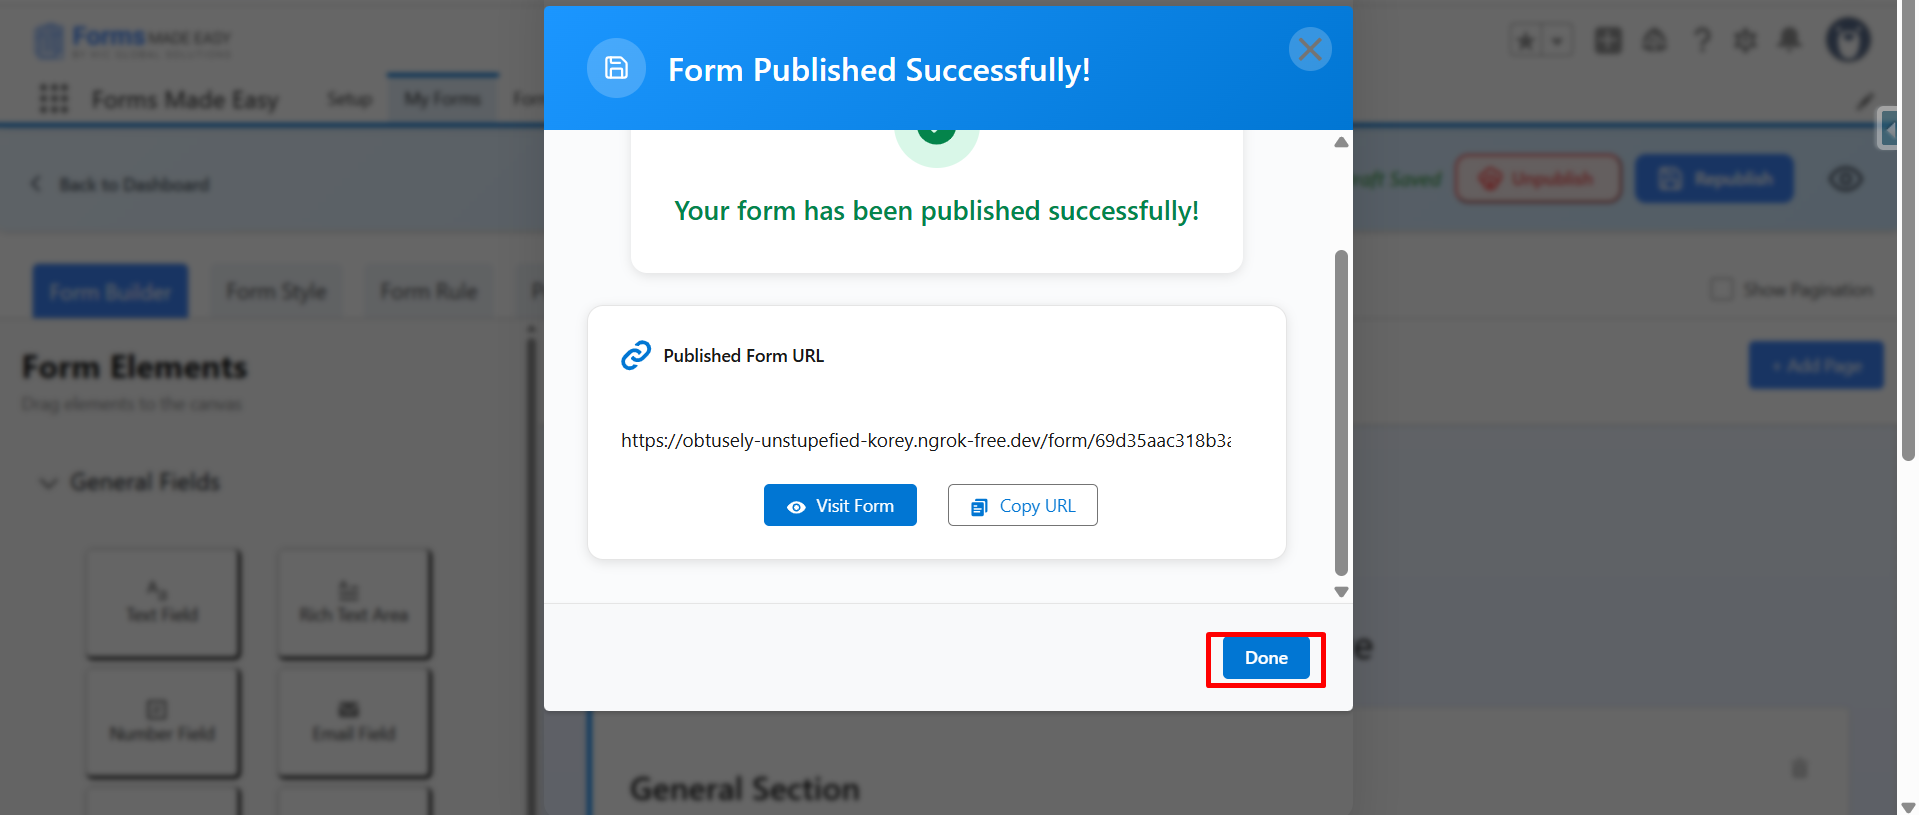
Step 10: Once it is published, click on “Done” to close the pop-up window.
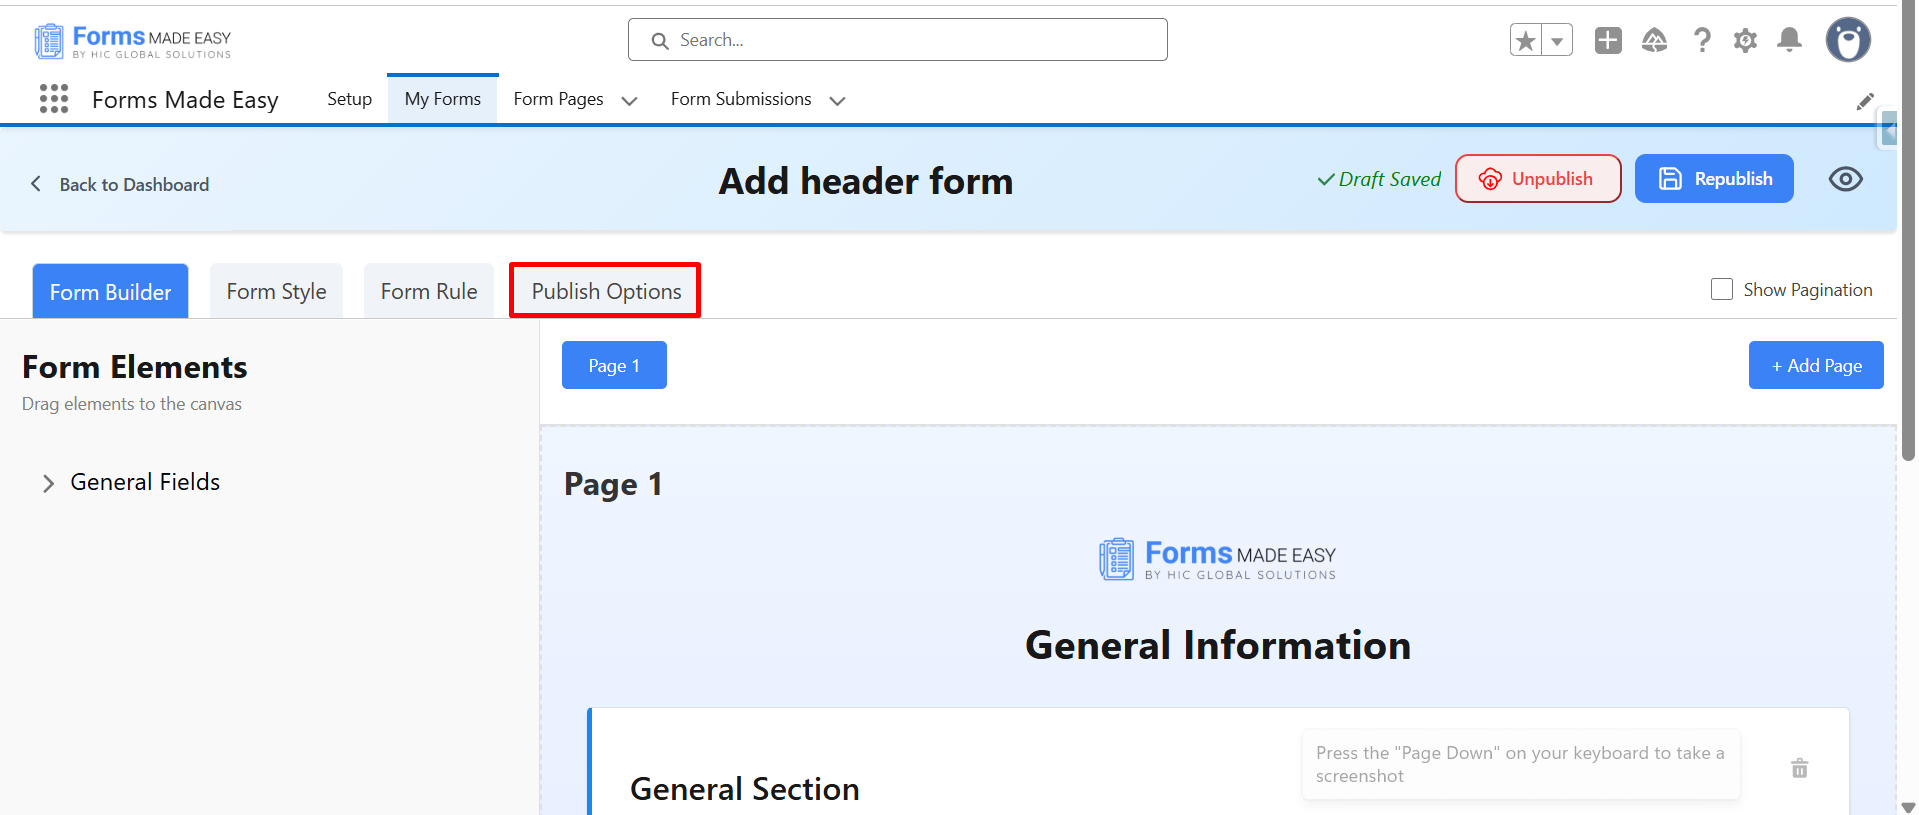
Step 11: Next, click on “Publish Options” to access the sharing settings.
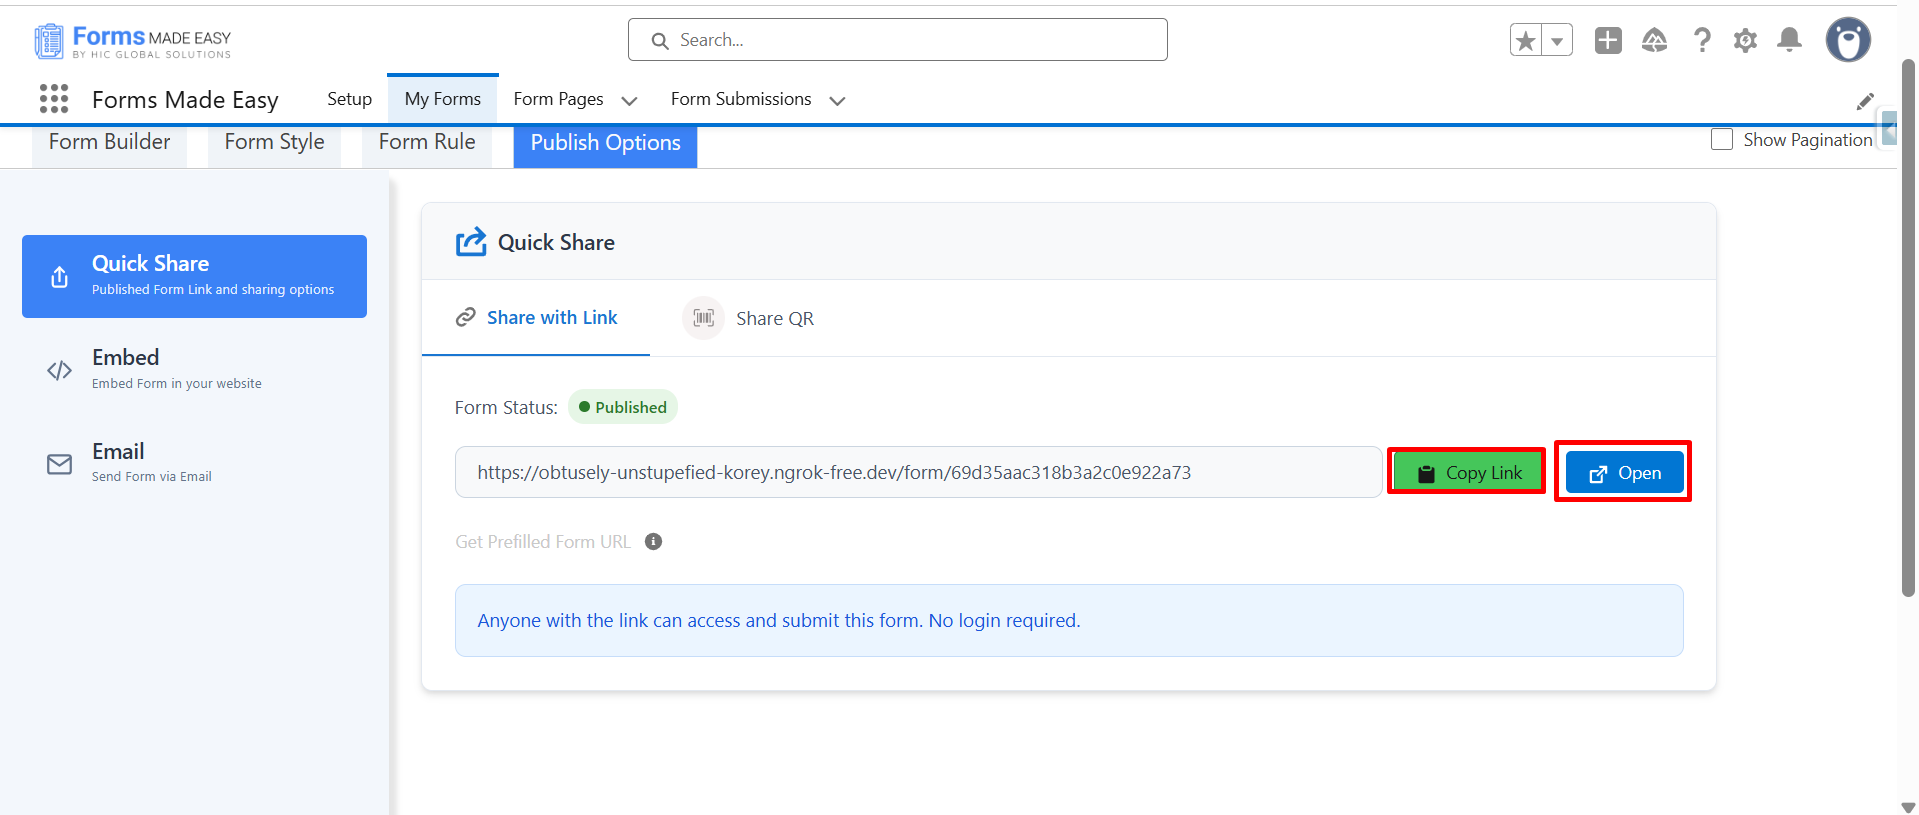
Step 12: Click on the Copy Link or Open buttons to open the forms directly on the web.
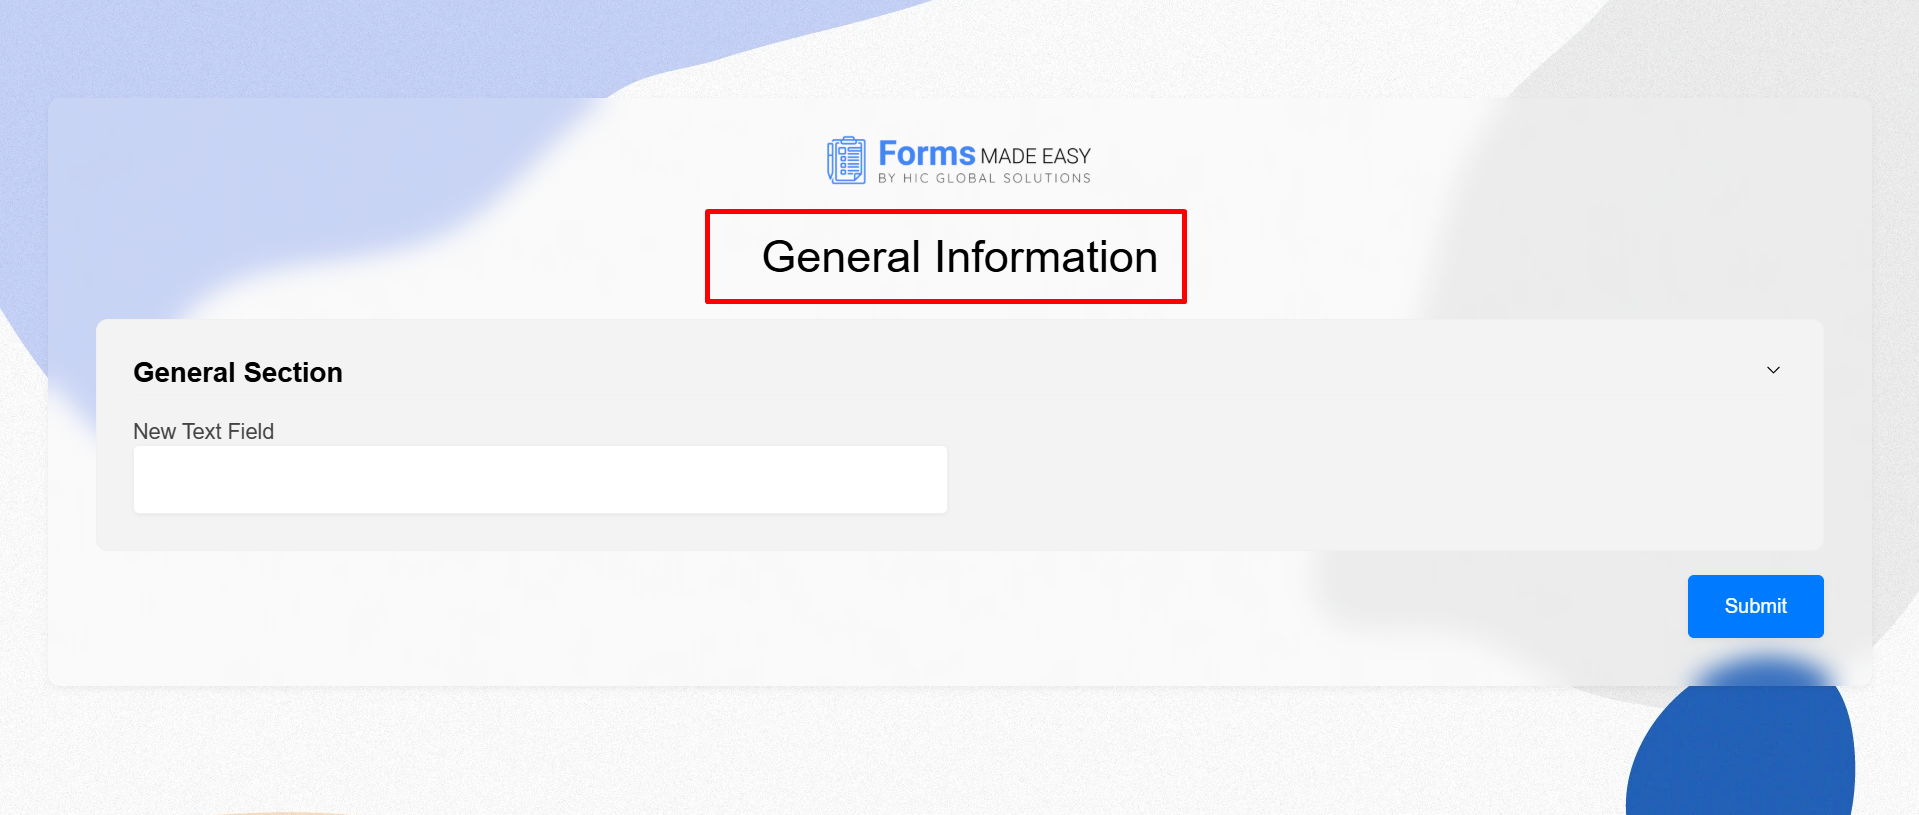
Step 13: The newly added header will now appear on the form as shown below.
Conclusion
Adding a header is a small step, but it makes a big difference in how your form looks and feels to the user. A clear heading improves readability and gives users proper context before they start filling out the Salesforce form. We hope the above guide has helped you understand the process clearly. If you still need any assistance, please contact support, and our team will be happy to help you further.