


Turn Forms Into Automated Workflows
Design dynamic forms, streamline operations, and eliminate repetitive manual tasks — all without code.
Talk to Our ExpertsBuild Smarter Forms Faster
Create no-code forms inside Salesforce and automate data collection, approvals, and workflows without complexity.
Get StartedSimplify Your Form Workflows
Replace manual processes with intelligent forms that capture, route, and manage data seamlessly in Salesforce.
Book a DemoCreating forms in Salesforce is simplified with Forms Made Easy, an AI-powered, Salesforce-native form builder. This tool features a drag-and-drop interface, ready-to-use templates, and conditional logic, allowing users to create, customize, publish, and manage forms without coding. The guide covers installation, form creation options (manual, template, or AI-generated), customization of fields and design, adding conditional logic, publishing, sharing, and tracking submissions. Forms Made Easy streamlines the process, making it suitable for various data collection needs within Salesforce.
Creating forms in Salesforce shouldn’t require complicated development, lengthy configurations, or third-party integrations.
Whether you’re collecting customer information, generating leads, managing registrations, or gathering feedback, a reliable Salesforce Form Builder can simplify the entire process.
That’s where Forms Made Easy, an AI-powered, Salesforce-native form builder, comes in.
With its drag-and-drop interface, ready-to-use templates, AI Form Assistant, and conditional logic, Forms Made Easy helps users create, customize, publish, and manage Salesforce forms without coding.
In this step-by-step guide, you’ll learn how to create a form in Salesforce using Forms Made Easy, from initial configuration to publishing and tracking submissions.
Why Use a Salesforce Form Builder?
Salesforce provides native tools such as Screen Flows for collecting information and guiding users through processes. However, building customized, publicly accessible forms may involve additional configuration.
A dedicated Salesforce Form Builder App simplifies form creation by offering visual design tools, reusable templates, and built-in publishing capabilities.
With Forms Made Easy, you can:
- Create forms using an intuitive drag-and-drop builder.
- Generate forms using AI prompts.
- Capture information directly in Salesforce.
- Apply conditional logic to create dynamic forms.
- Customize form layouts and branding.
- Collect signatures, files, and customer feedback.
- Share forms through links, QR codes, or website embeds.
- Monitor form submissions within Salesforce.
Let’s explore how to build your first form.
Step 1: Install and Configure Forms Made Easy in Salesforce
Before creating your first form, complete the initial configuration.
- Install the Application
Install Forms Made Easy in your Salesforce organization.
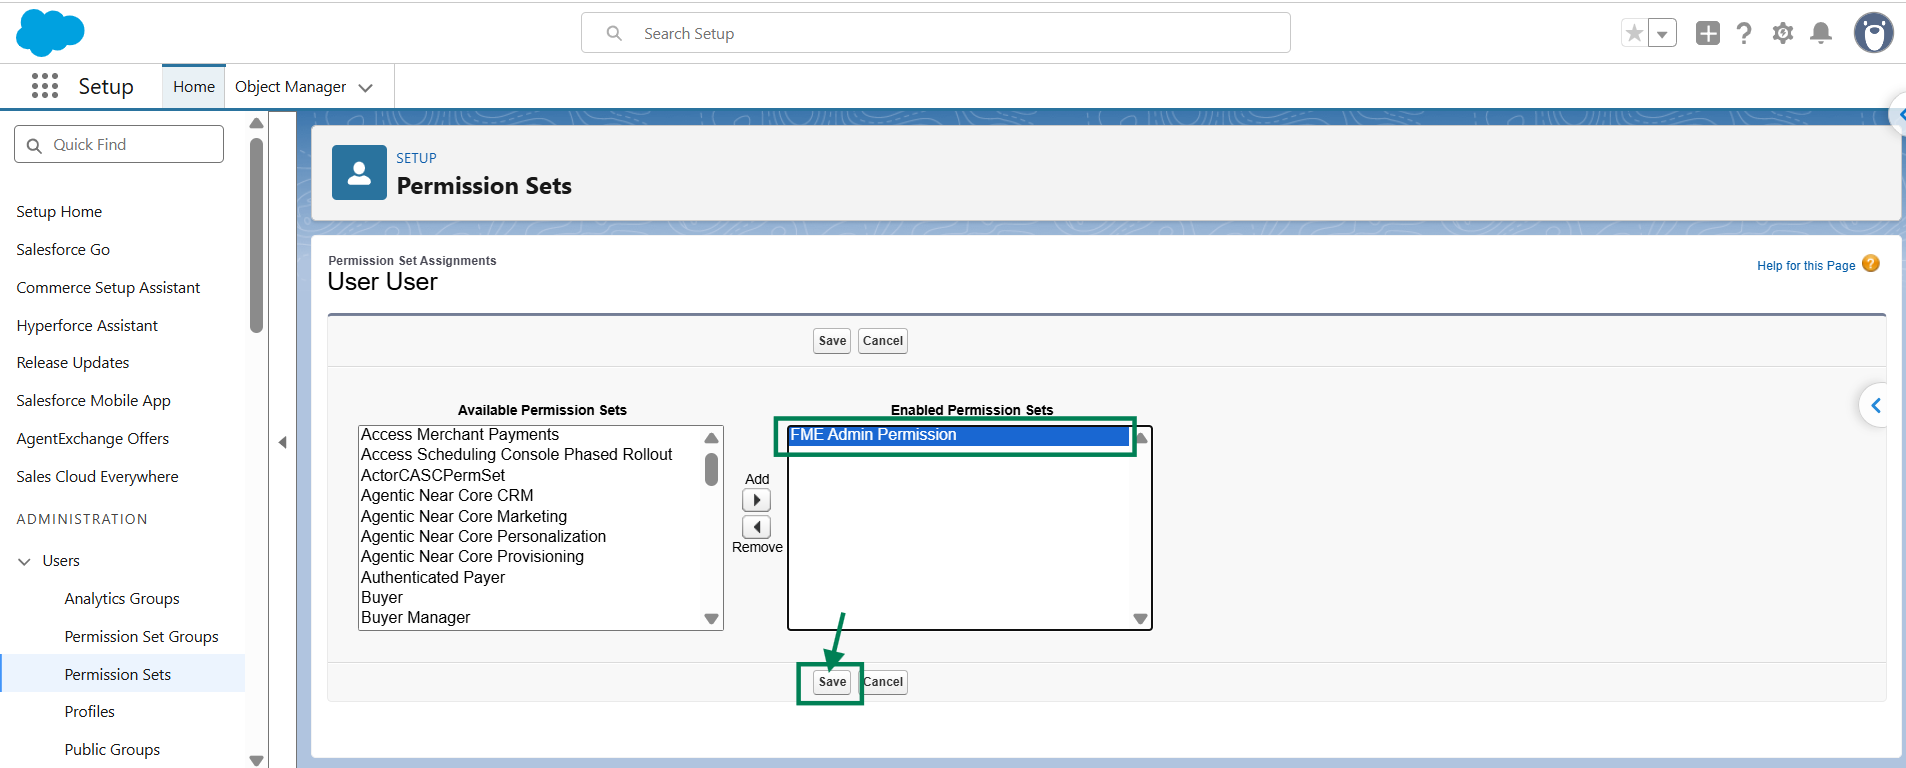
Navigate to Setup > Permission Sets and assign the FME Admin permission set to authorized form builders.
- Create a Salesforce Site
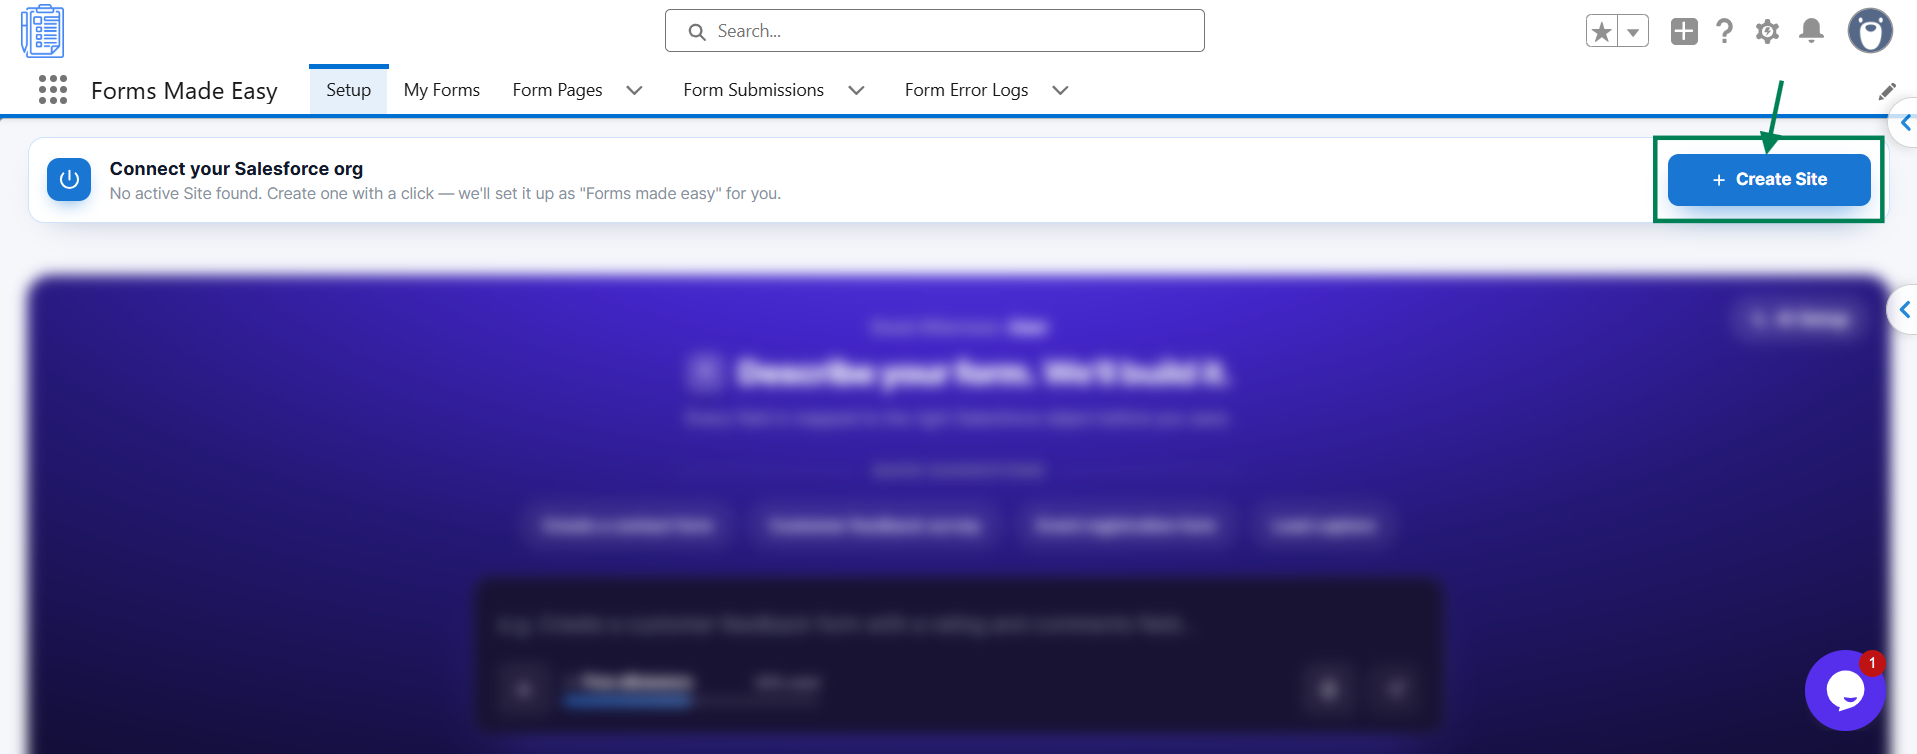
Open the Setup tab inside Forms Made Easy.
If no Salesforce Site exists, click Create Site.
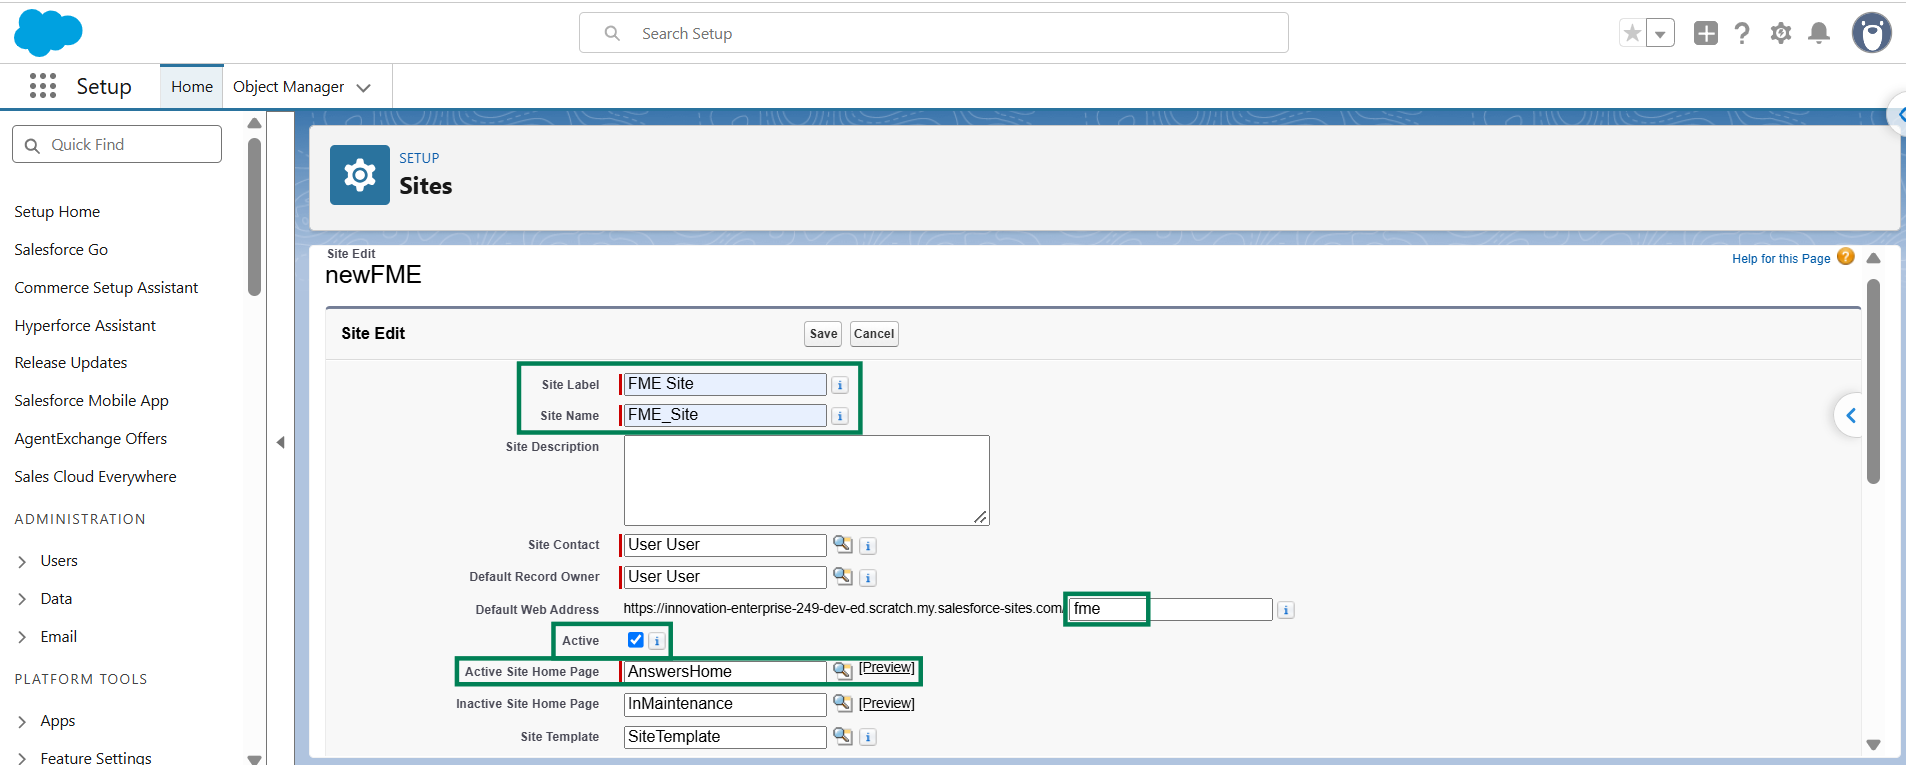
Configure the following:
- Enter the Site Label and Site Name.
- Enable the Active option.
- Select a page, such as AnswerHome.
- Click Save.
- Configure Guest Access
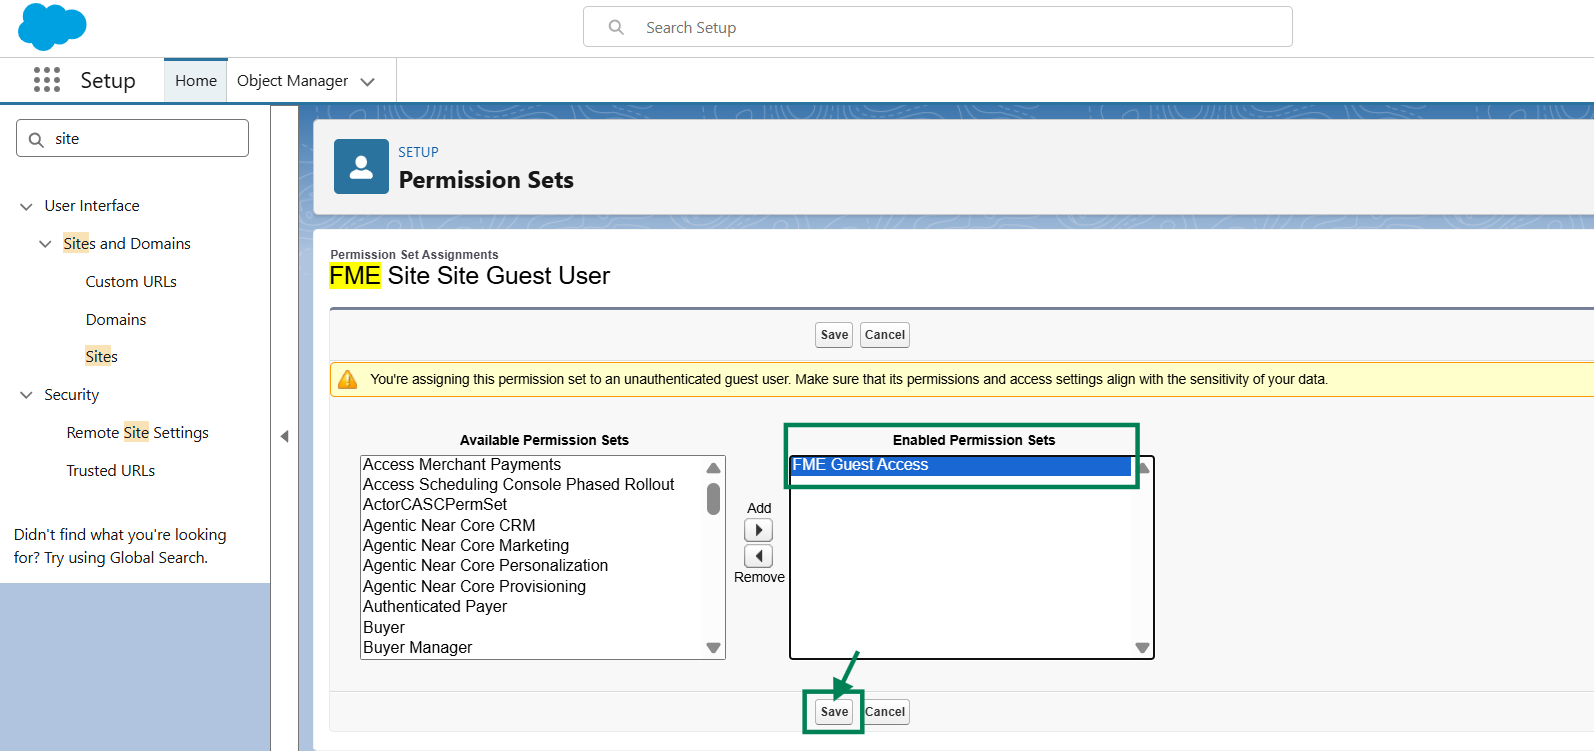
Navigate to Public Access Settings > View Users.
Open the relevant guest user and assign the FME Guest Access permission set.
Ensure public access permissions follow your organization’s security requirements
- Connect Your Site
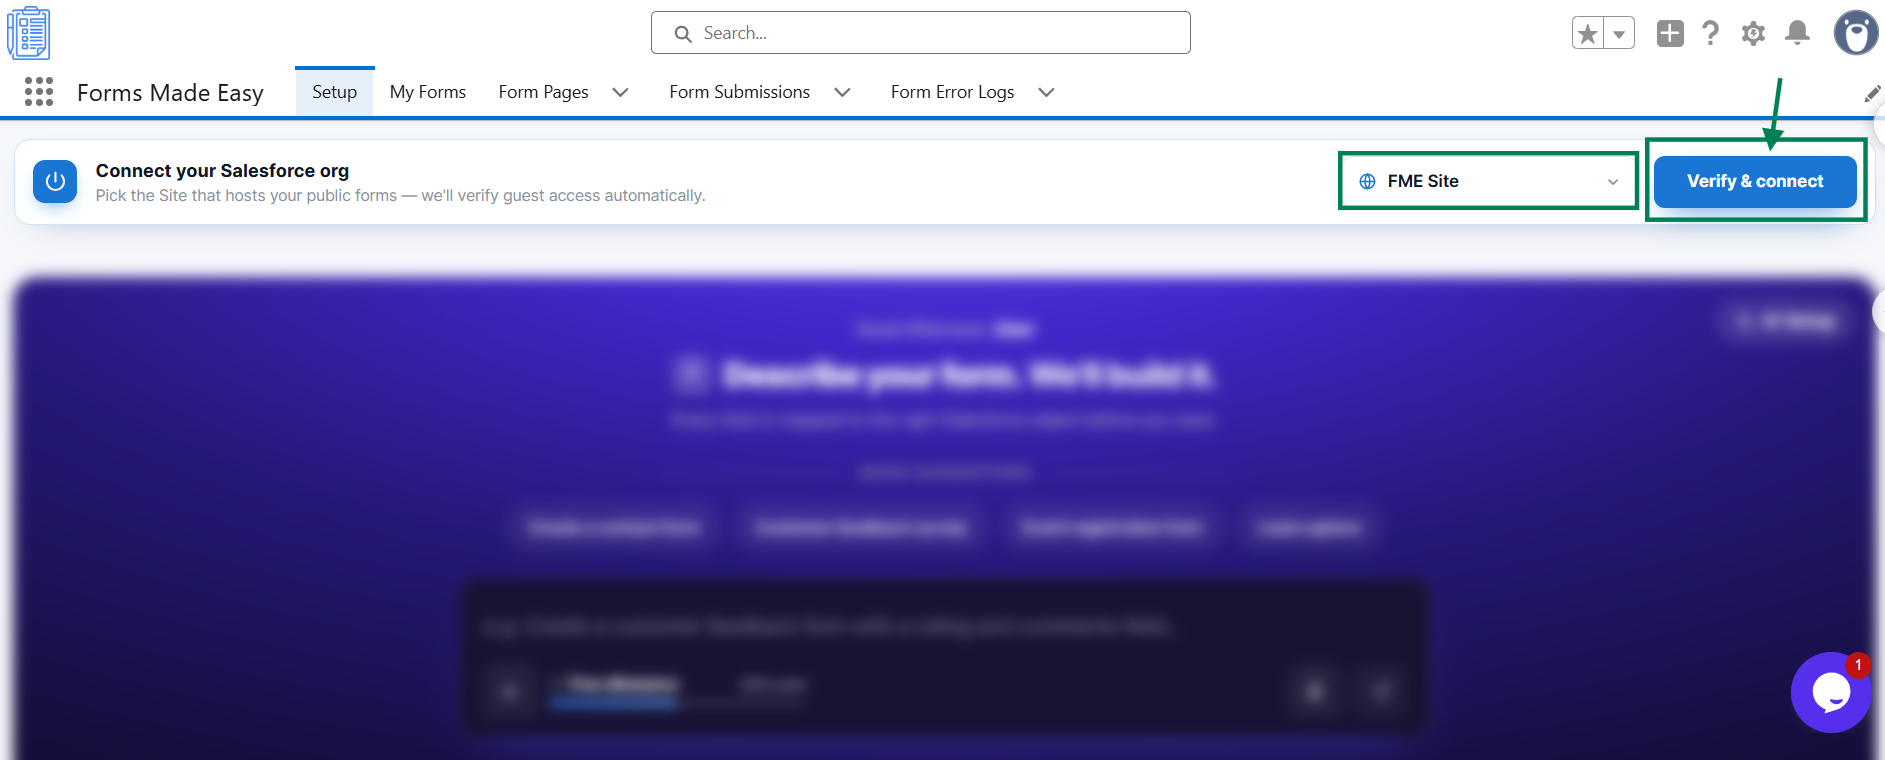
Return to the Forms Made Easy Setup tab.
Click Select Site, choose your configured Site, and select Verify & Connect.
Once verification succeeds, your Forms Made Easy dashboard becomes accessible.
Pro Tip: You can optionally configure AI Setup to connect supported AI providers, including ChatGPT, Claude, or Gemini. Google reCAPTCHA can also be configured under My Forms > Settings for spam protection.
Step 2: Create Your First Salesforce Form
Forms Made Easy offers three approaches to building forms, making it suitable for beginners and experienced Salesforce administrators.
Option 1: Build a Form Manually
Want complete control over your form?
Click Build Form Manually.
Choose between Salesforce Objects and General Fields.
Select your preferred Salesforce object, enter a Form Name, and click Create Form.
This approach works well for custom Salesforce data collection forms.
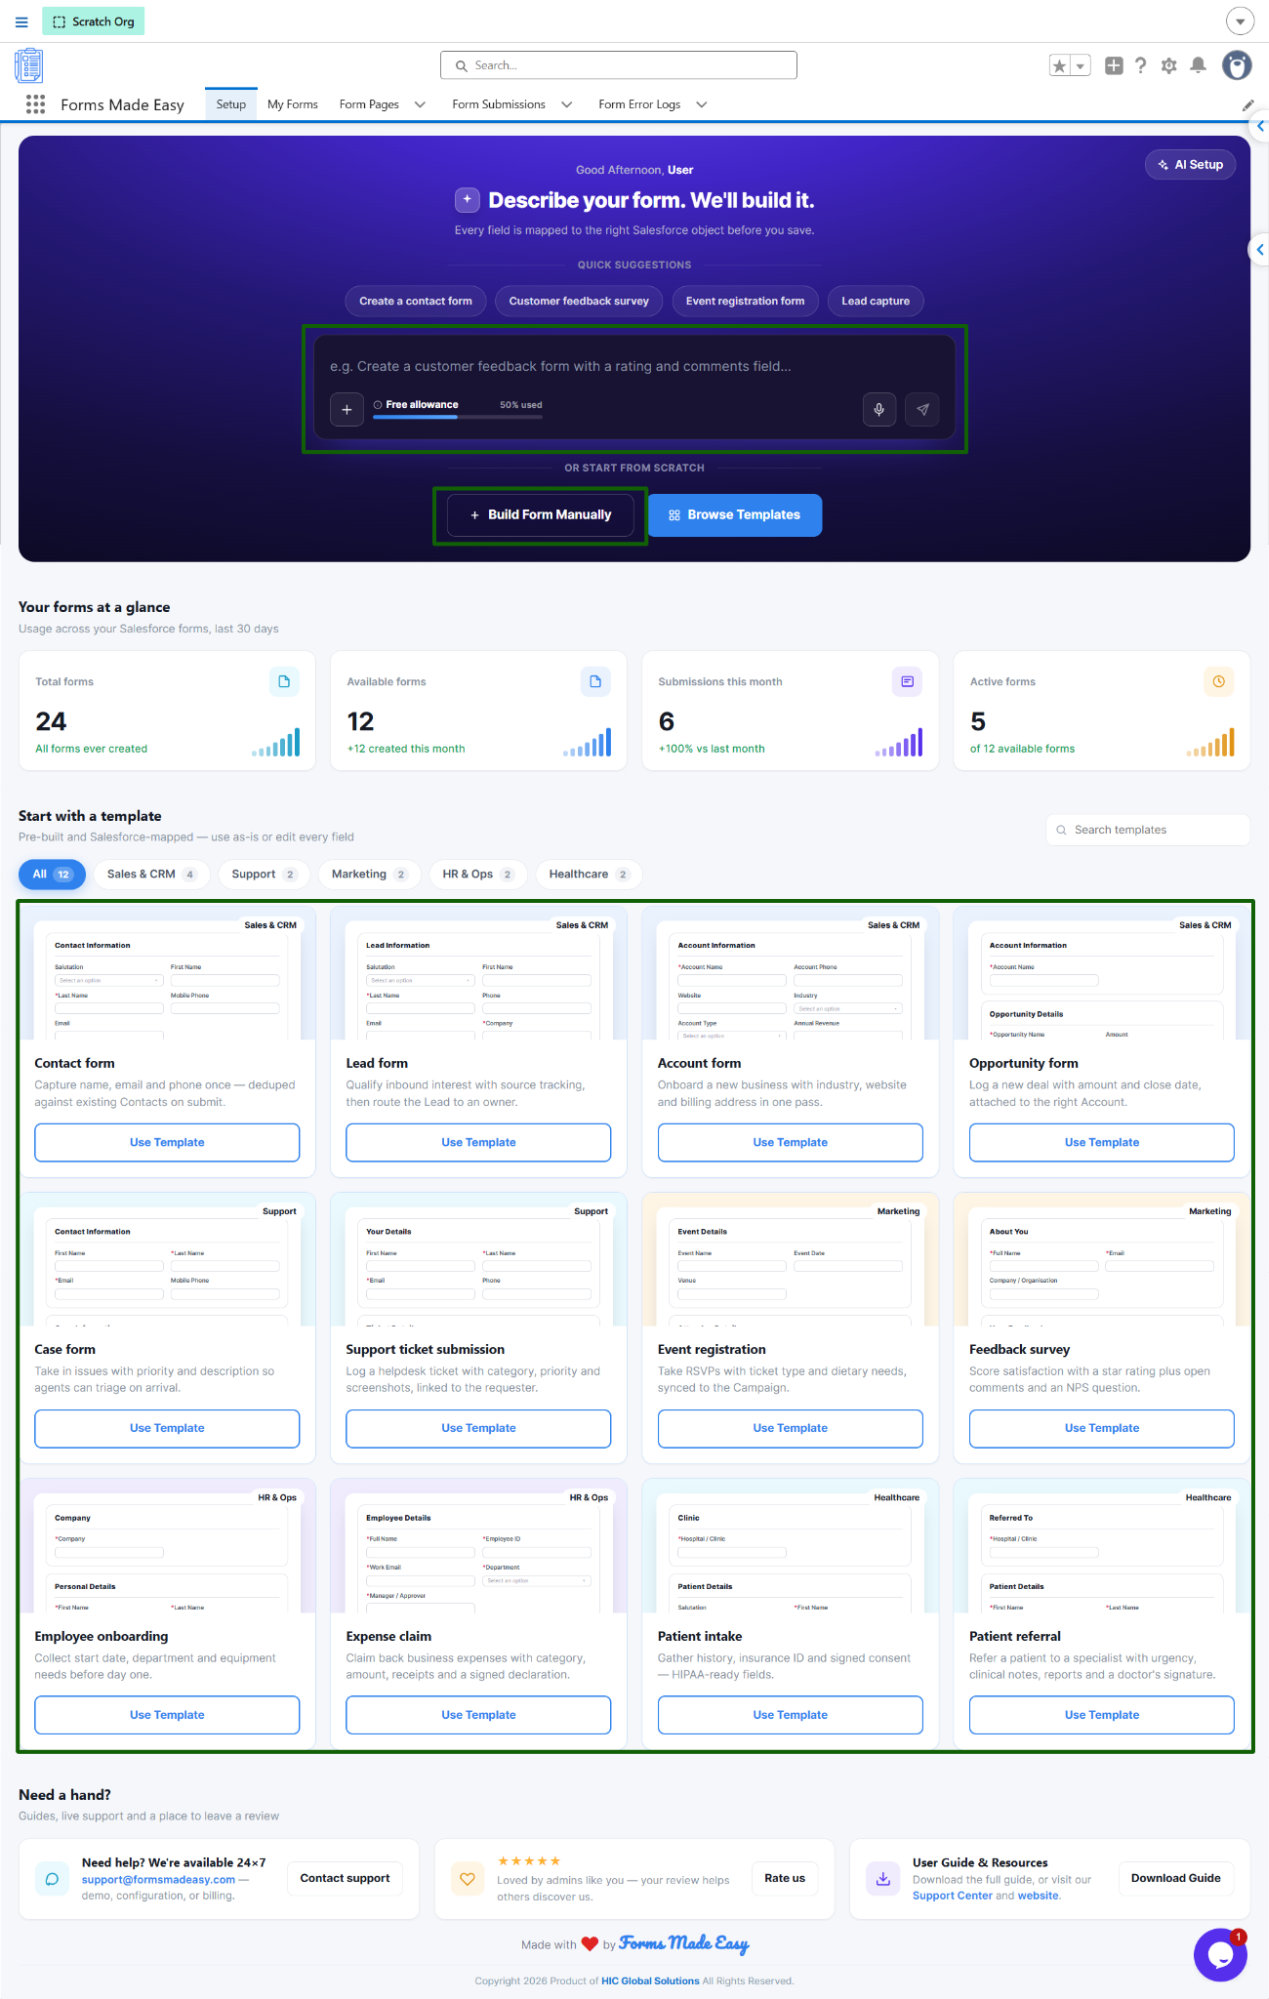
Option 2: Start with a Ready-Made Template
Instead of building everything from scratch, select a template from the Start with a Template section.
Available examples include Contact, Lead, and Case forms.
Click Use Template to open your selected form in the builder.
Templates help standardize common processes such as lead capture, contact registration, and customer support requests.
Option 3: Generate a Form Using AI
Looking for a faster approach?
Forms Made Easy includes an AI Form Builder for Salesforce that generates form templates from natural-language instructions.
For example, enter:
Create a customer feedback form with customer name, email, a five-star rating, and a comments field.
Click Send.
Once the system displays Template Ready, open the generated form and customize it as needed.
This approach helps reduce repetitive manual form-building work.
Step 3: Add and Customize Form Fields
After creating your form, it’s time to configure the information you want to collect.
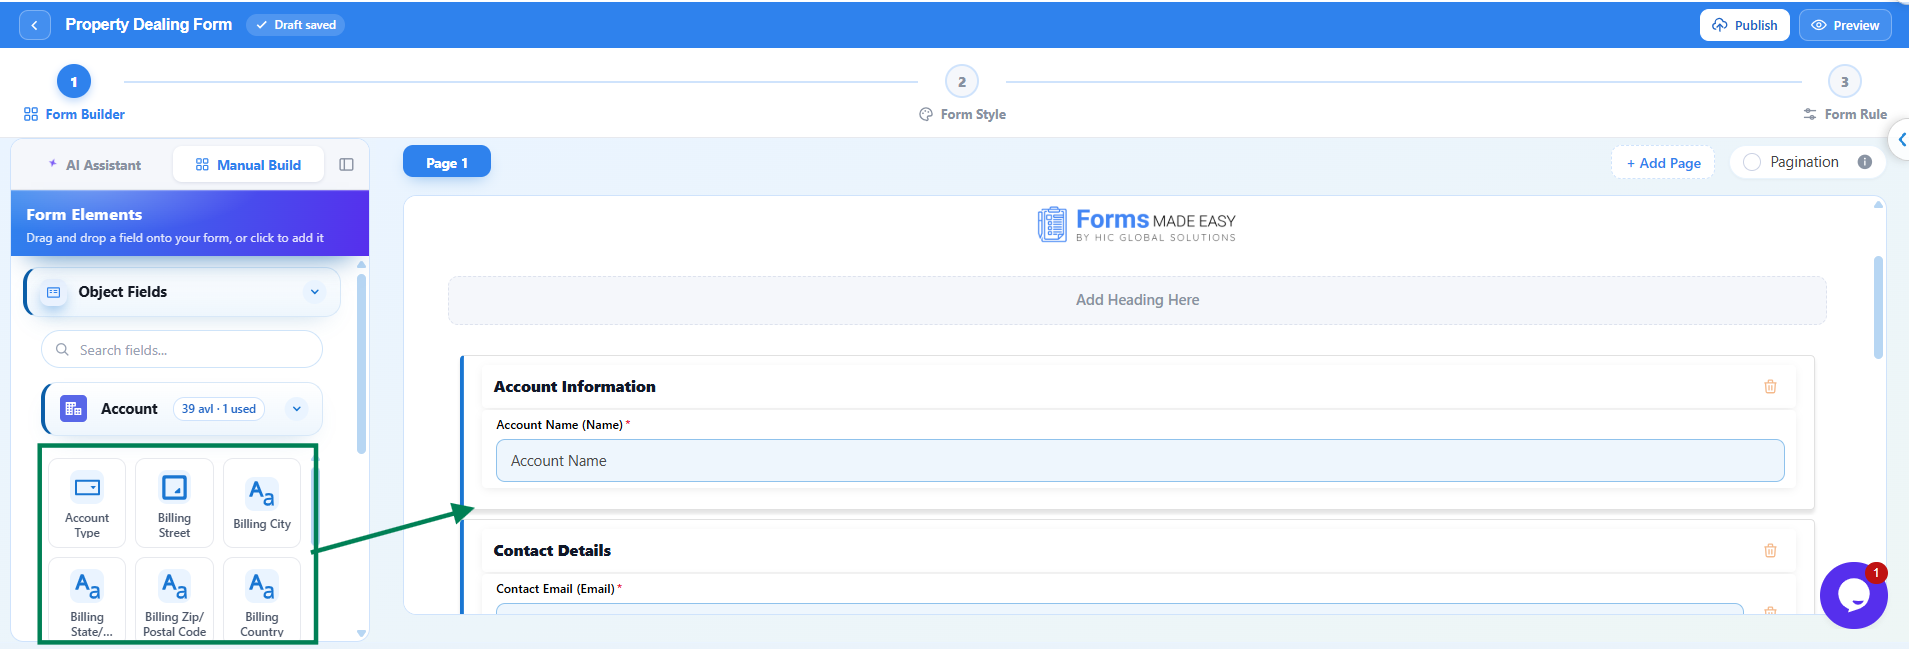
Inside the drag-and-drop form builder, locate the Form Elements panel.
Drag fields onto your form or click an element to add it.
Forms Made Easy supports several field types, including:
- Text, Email, and Phone: Capture contact information.
- Number and Date: Collect numerical or date-based responses.
- Picklist and Selection Groups: Provide predefined answer options.
- File Upload: Collect documents and images.
- Signature: Capture electronic signatures.
- Rating: Gather customer satisfaction scores.
- Live Photo: Allow respondents to capture photos.
- Payment: Collect payments through Stripe.
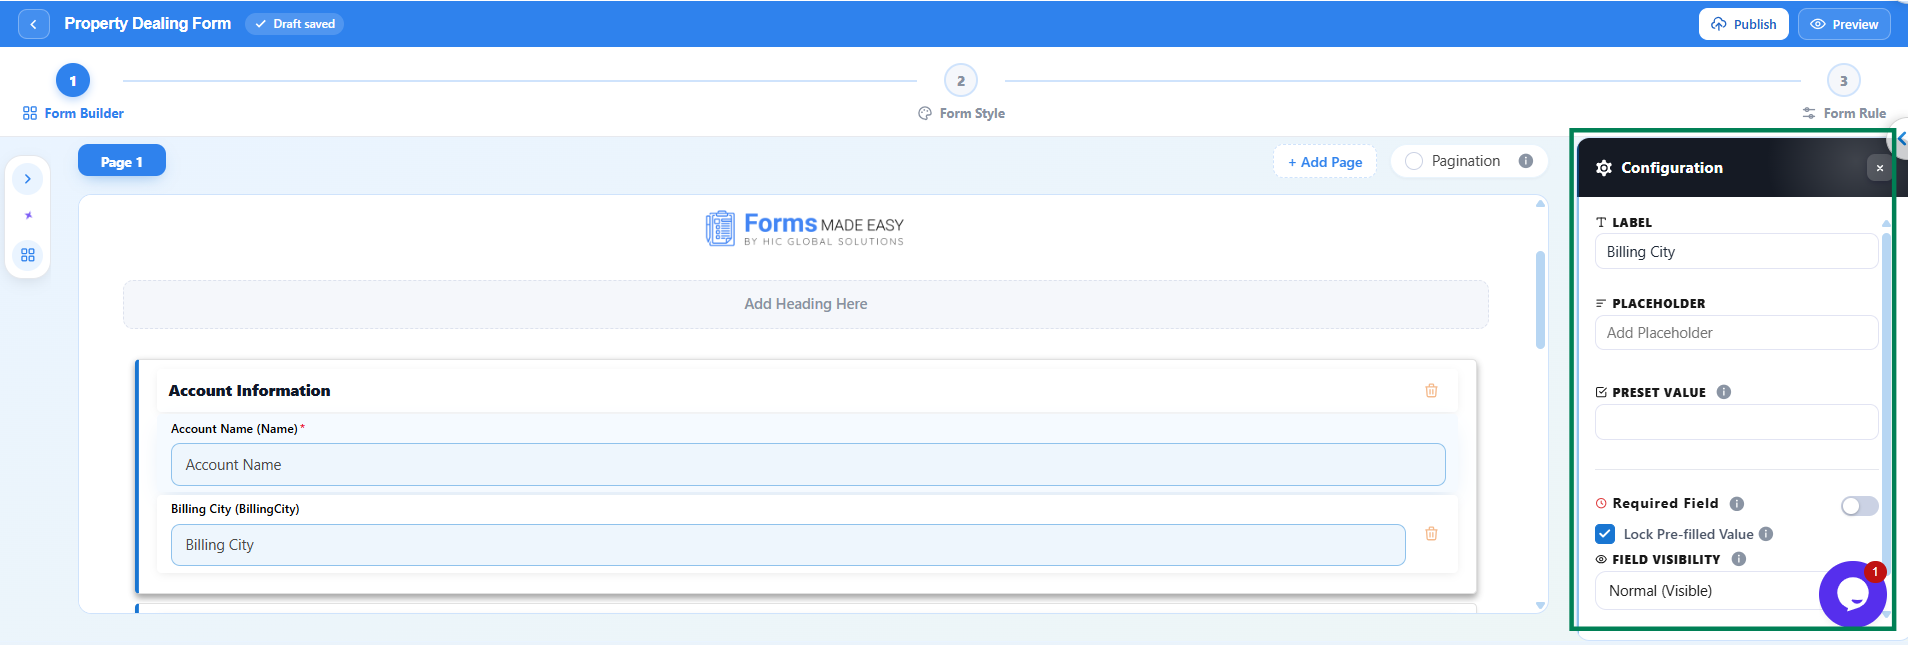
Click any field to access its Configuration settings.
You can modify the field label, placeholder, preset value, and required-field settings.
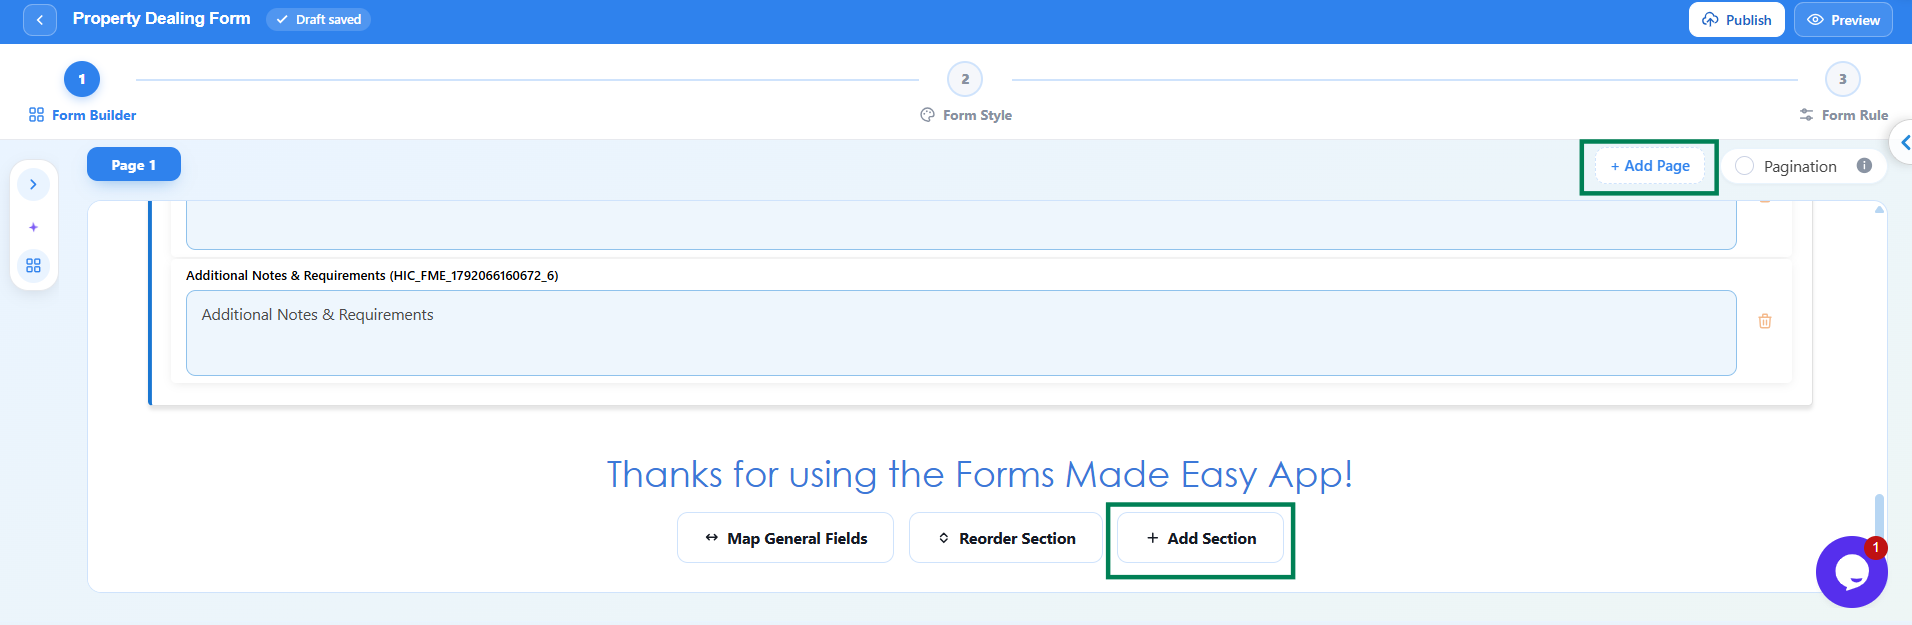
For longer forms, use + Add Section and + Add Page to organize information.
You can also customize headers, logos, headings, and footers.
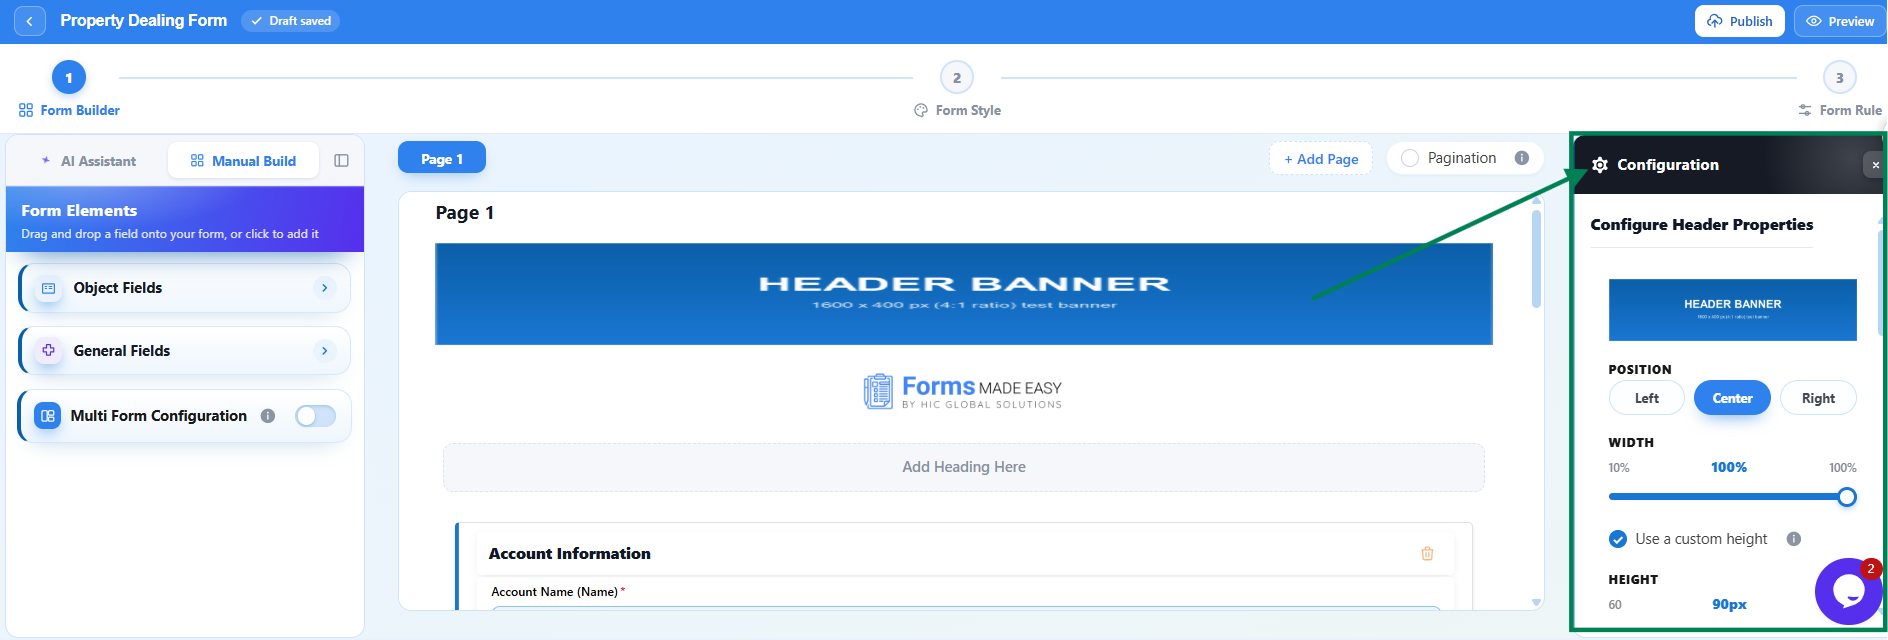
AI Tip: Use the AI Form Assistant to request modifications, such as Add a phone field after the email field. You can also undo the last AI-generated change.
Step 4: Customize Your Form’s Design
A professional-looking form creates a more consistent experience for your customers.
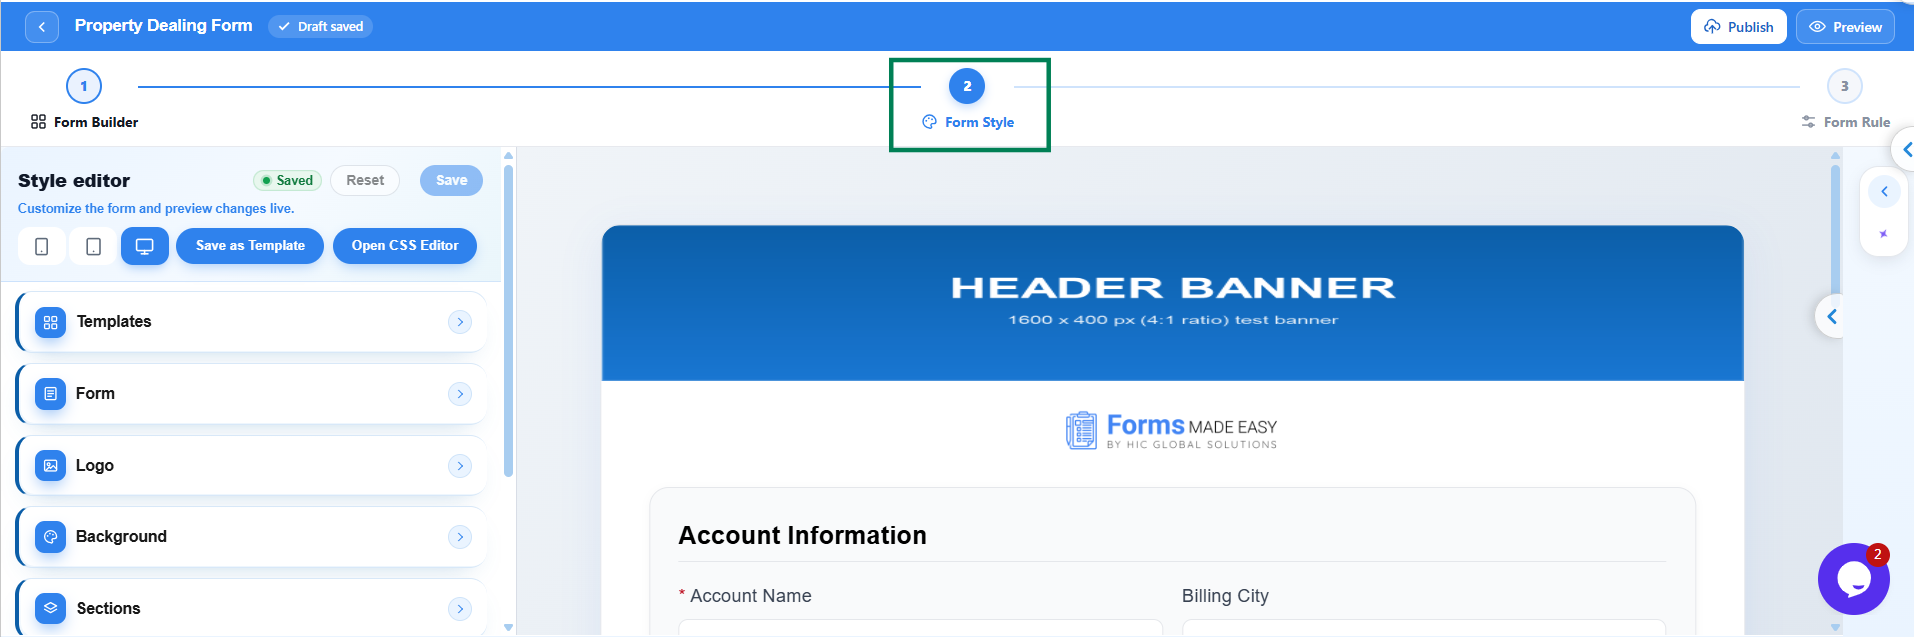
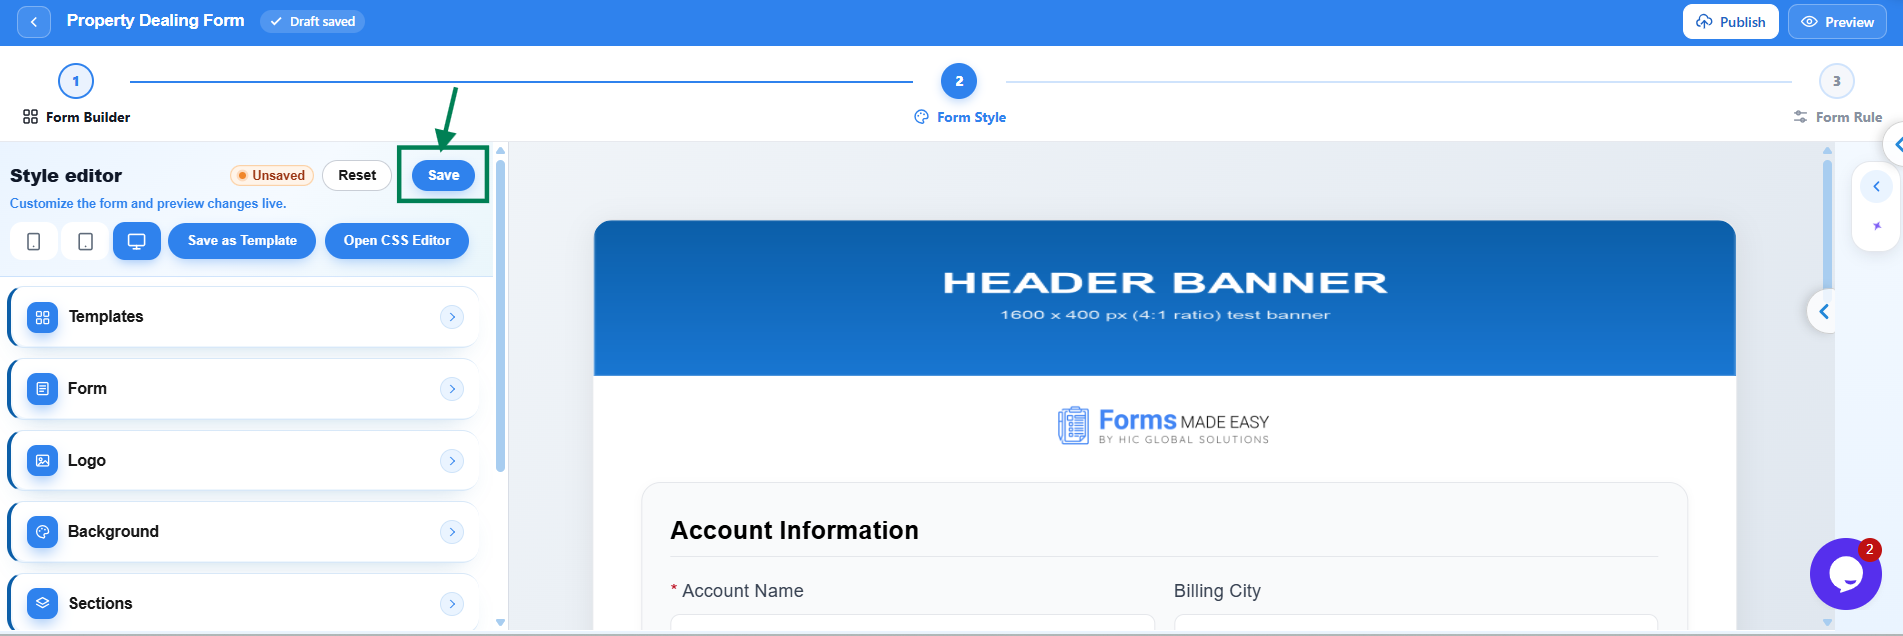
Open the Form Style tab to customize its appearance.
You can:
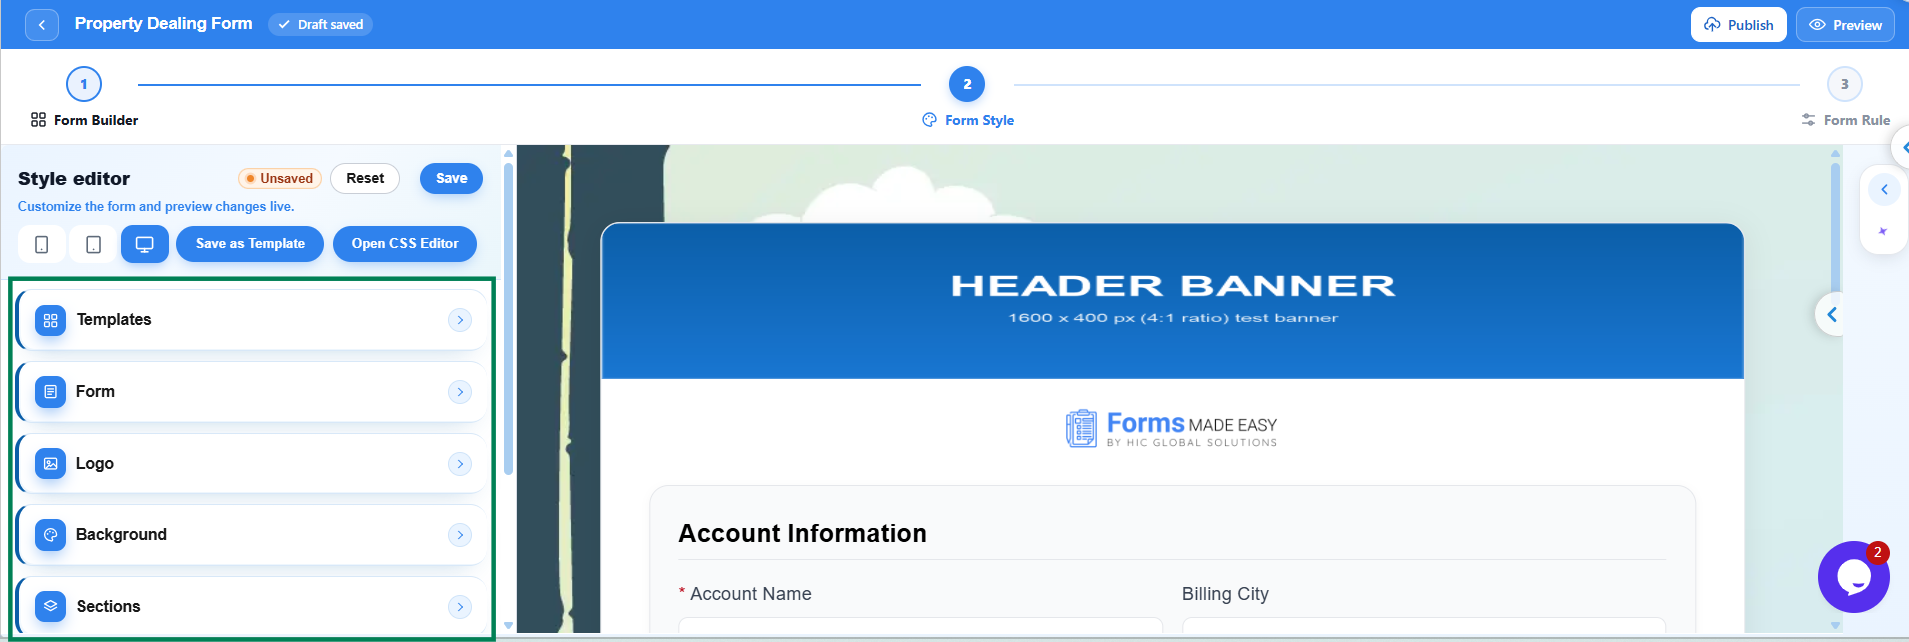
- Apply ready-made design templates.
- Change colors, fonts, and backgrounds.
- Customize form fields and buttons.
- Add company branding.
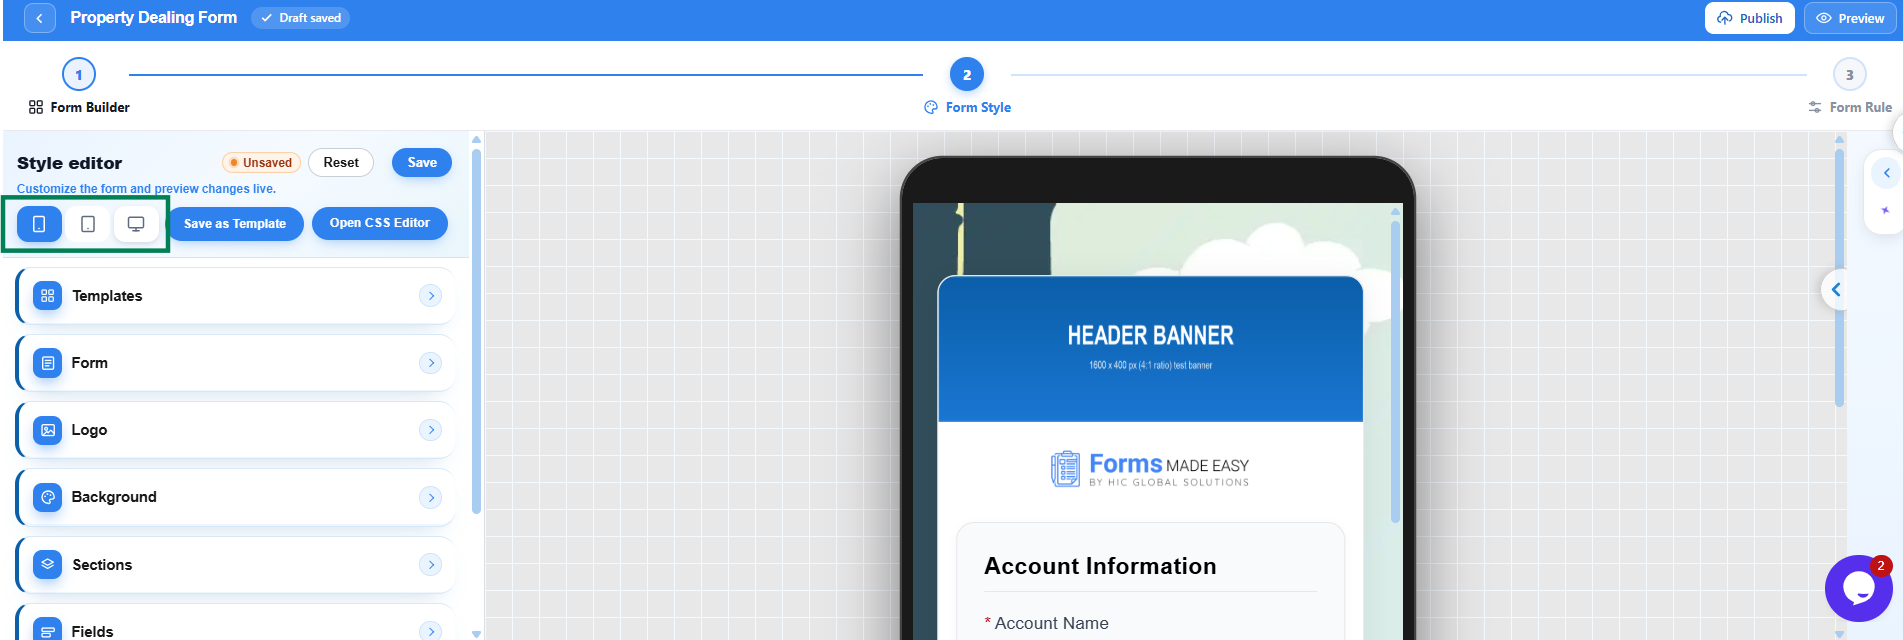
- Preview layouts across different devices.
- Check the Mobile, Tablet, and Desktop previews.
Once you’re satisfied, click Save, followed by Save Changes.
Step 5: Add Conditional Logic to Your Salesforce Form
Not every respondent needs to answer the same questions.
With Salesforce Conditional Logic Forms, you can dynamically control fields based on user responses.
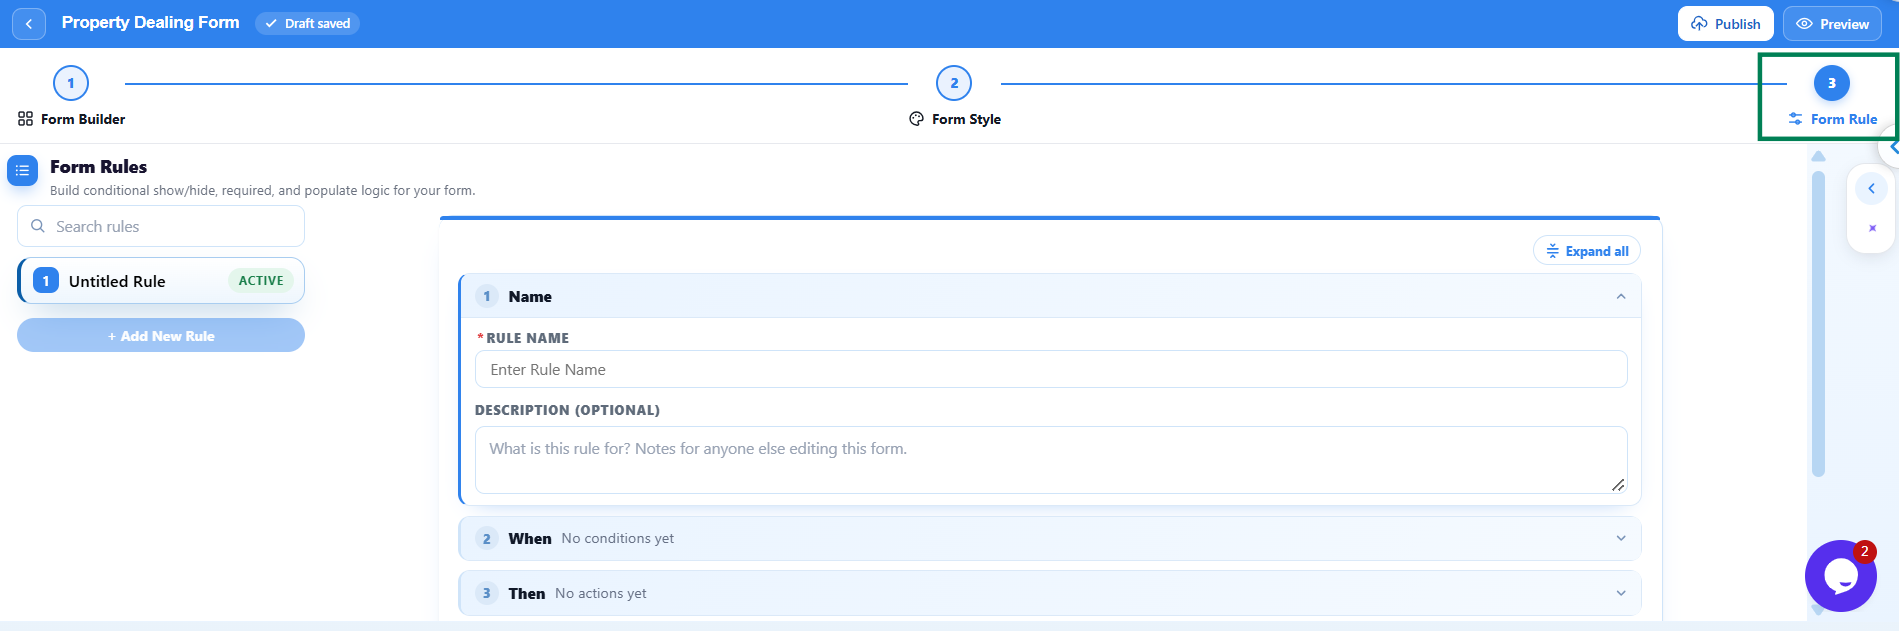
Open the Form Rule tab.
Follow these steps:
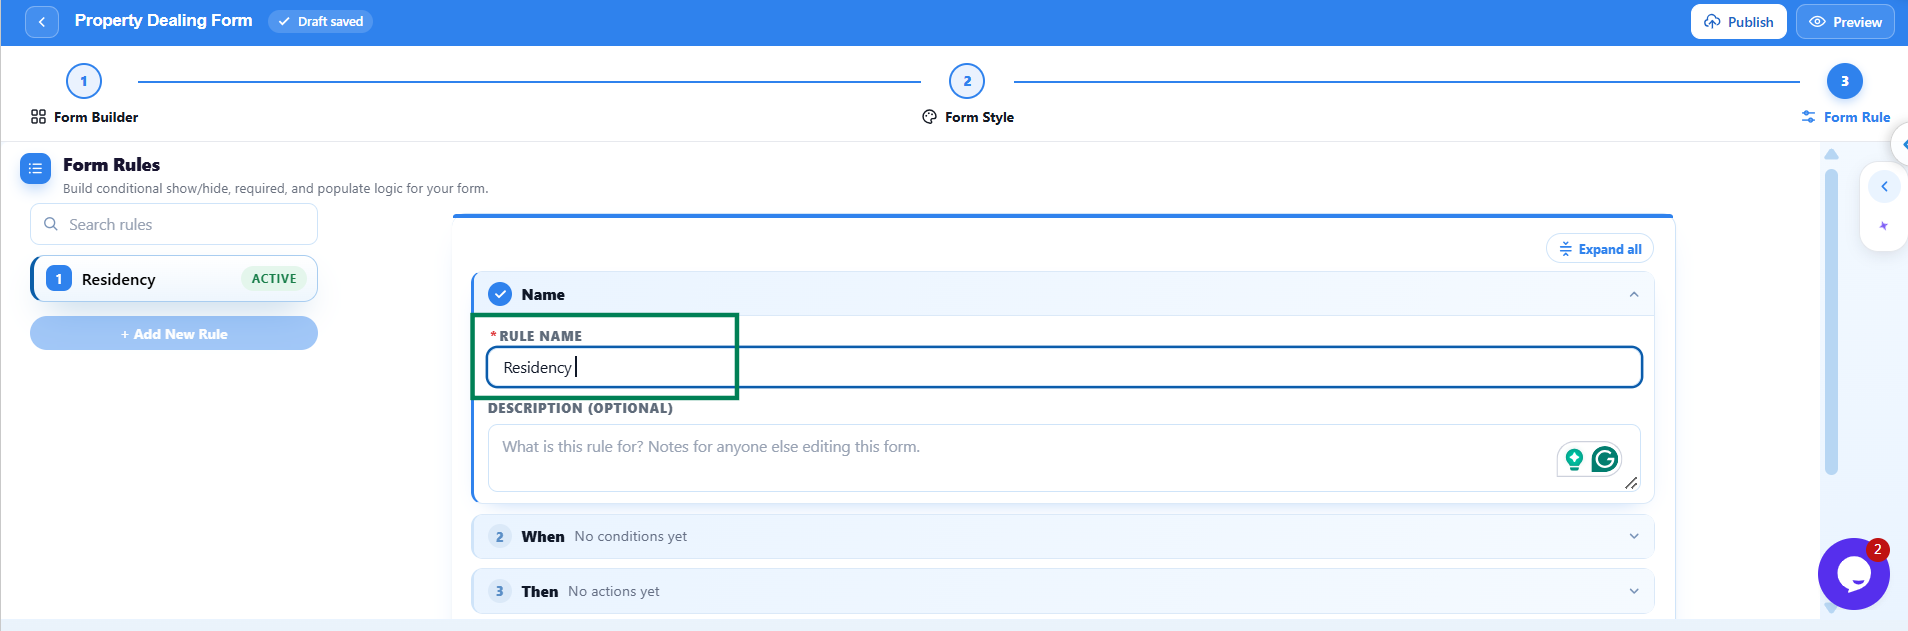
- Enter a Rule Name.
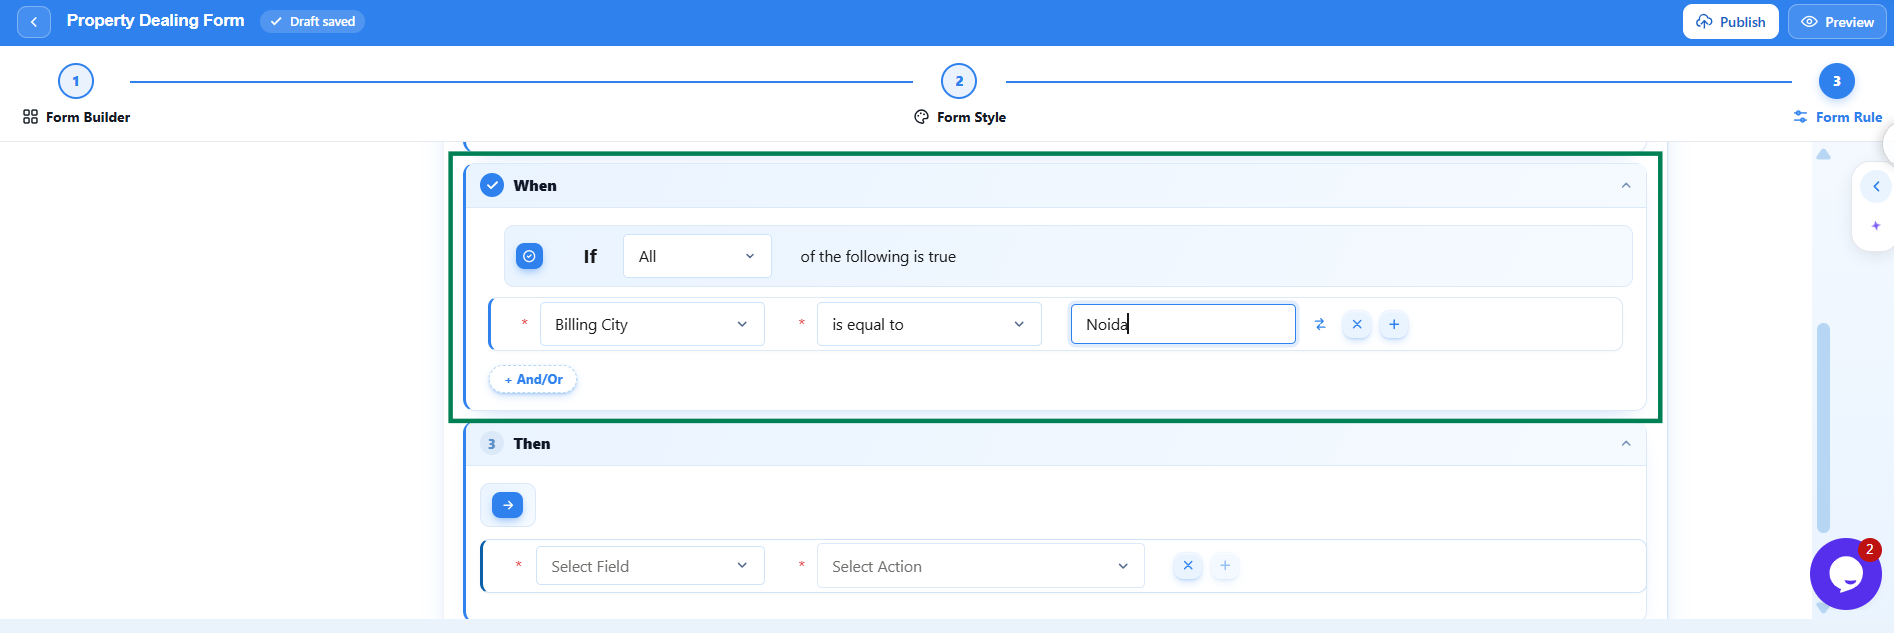
- Under When, select a field.
- Choose an operator, such as is equal to.
- Enter the corresponding value.
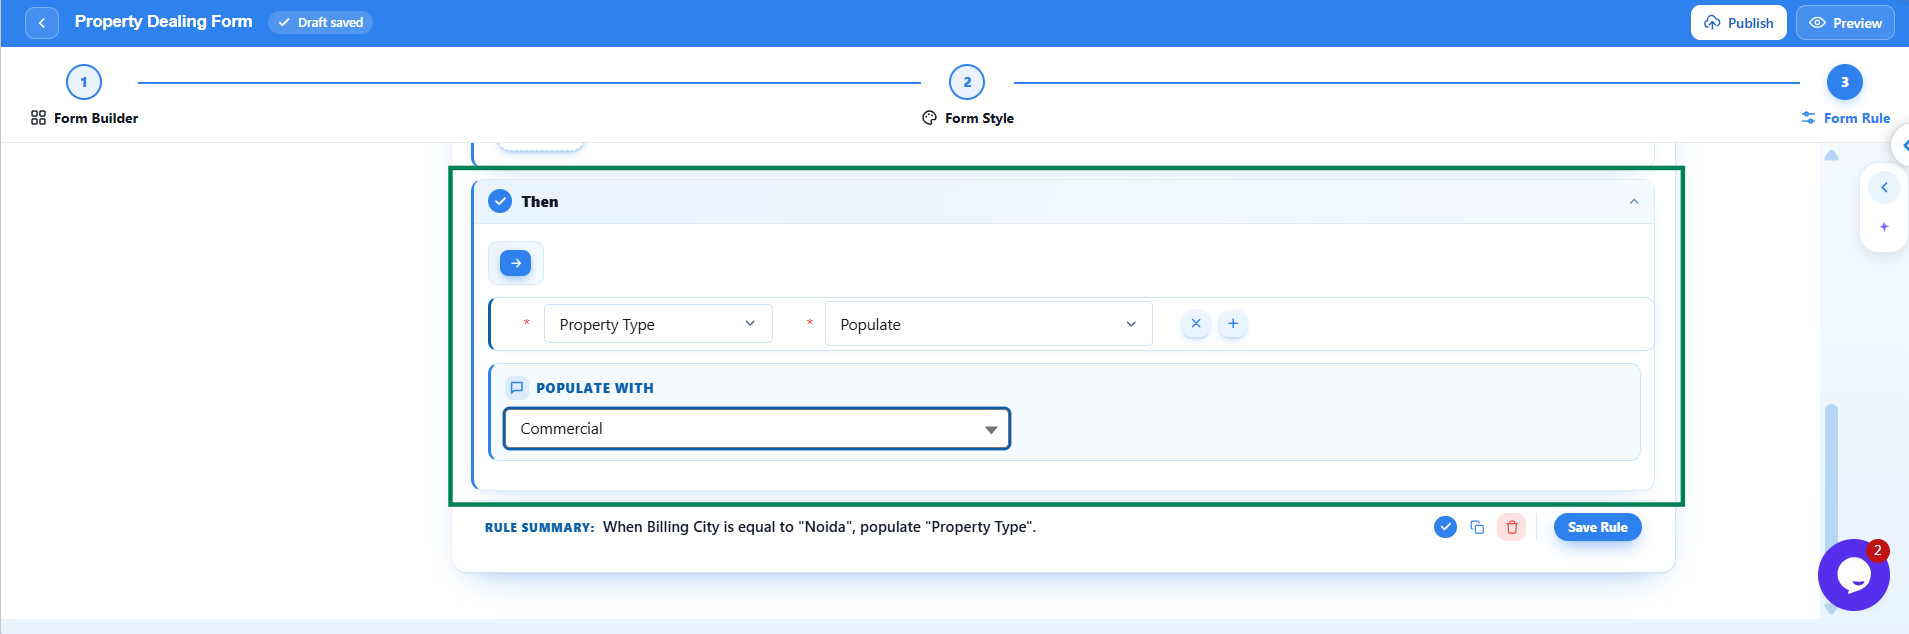
- Under Then, select the target field.
- Choose an action, such as Show, Hide, or Make Required.
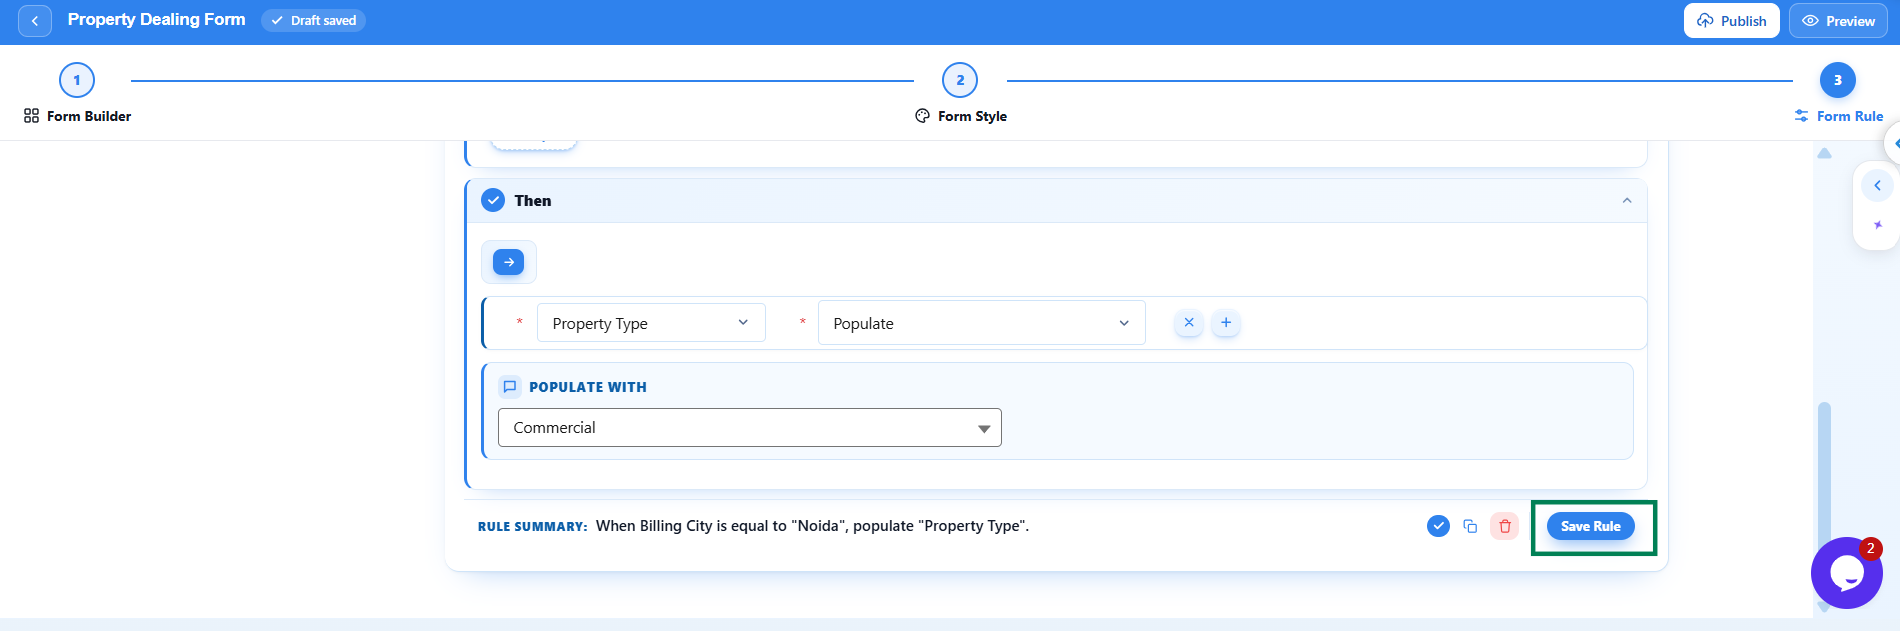
- Click Save Rule.
For example, when a respondent selects a particular city, you can automatically populate another field with a corresponding value.
Conditional logic helps create more relevant forms while reducing unnecessary questions.
Step 6: Preview and Publish Your Salesforce Form
Before making your form publicly available, test its behavior.
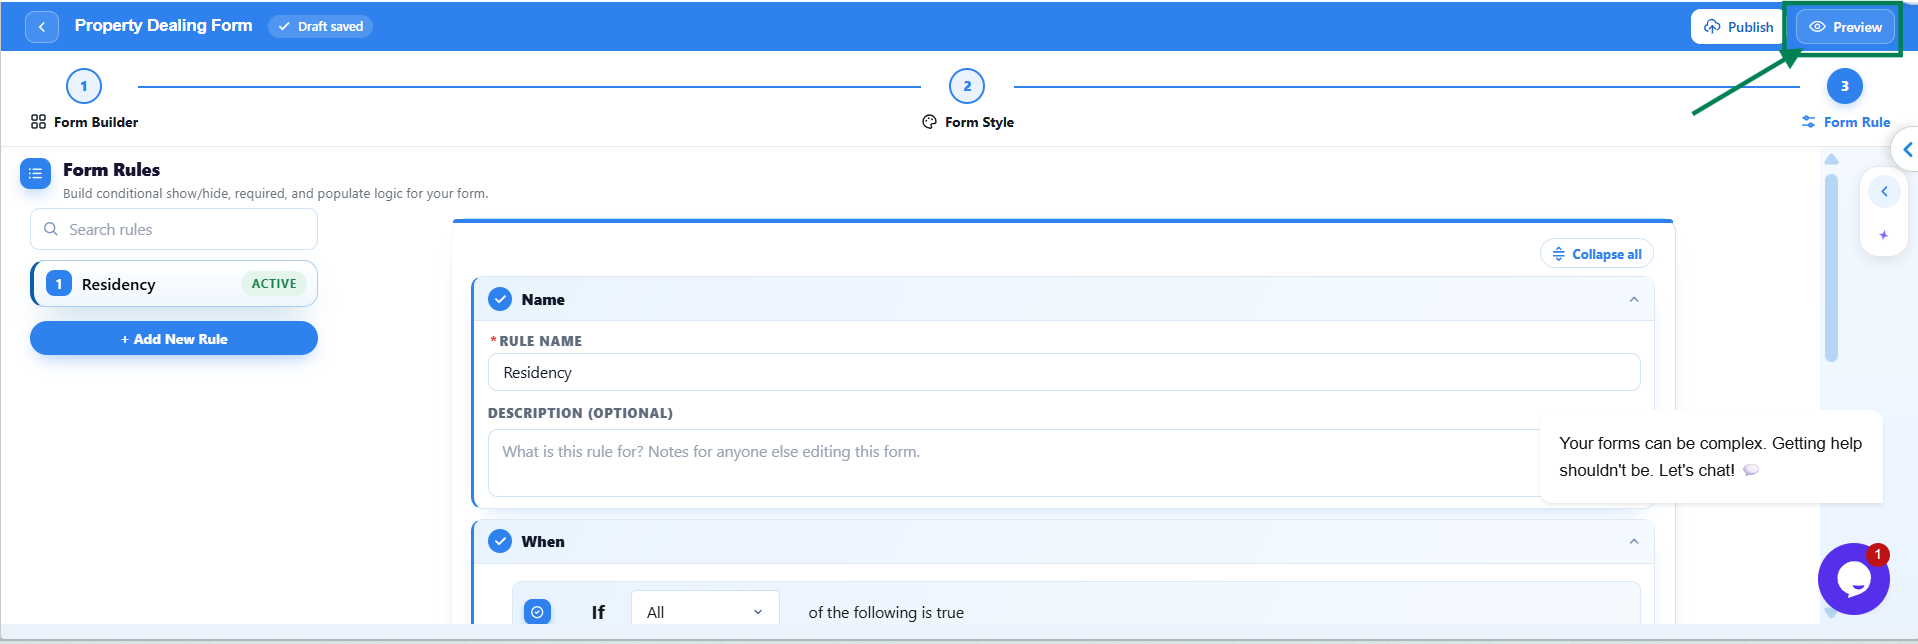
Click Preview to open the form in a new browser tab.
Verify that all required fields, conditional rules, and design elements work as expected.
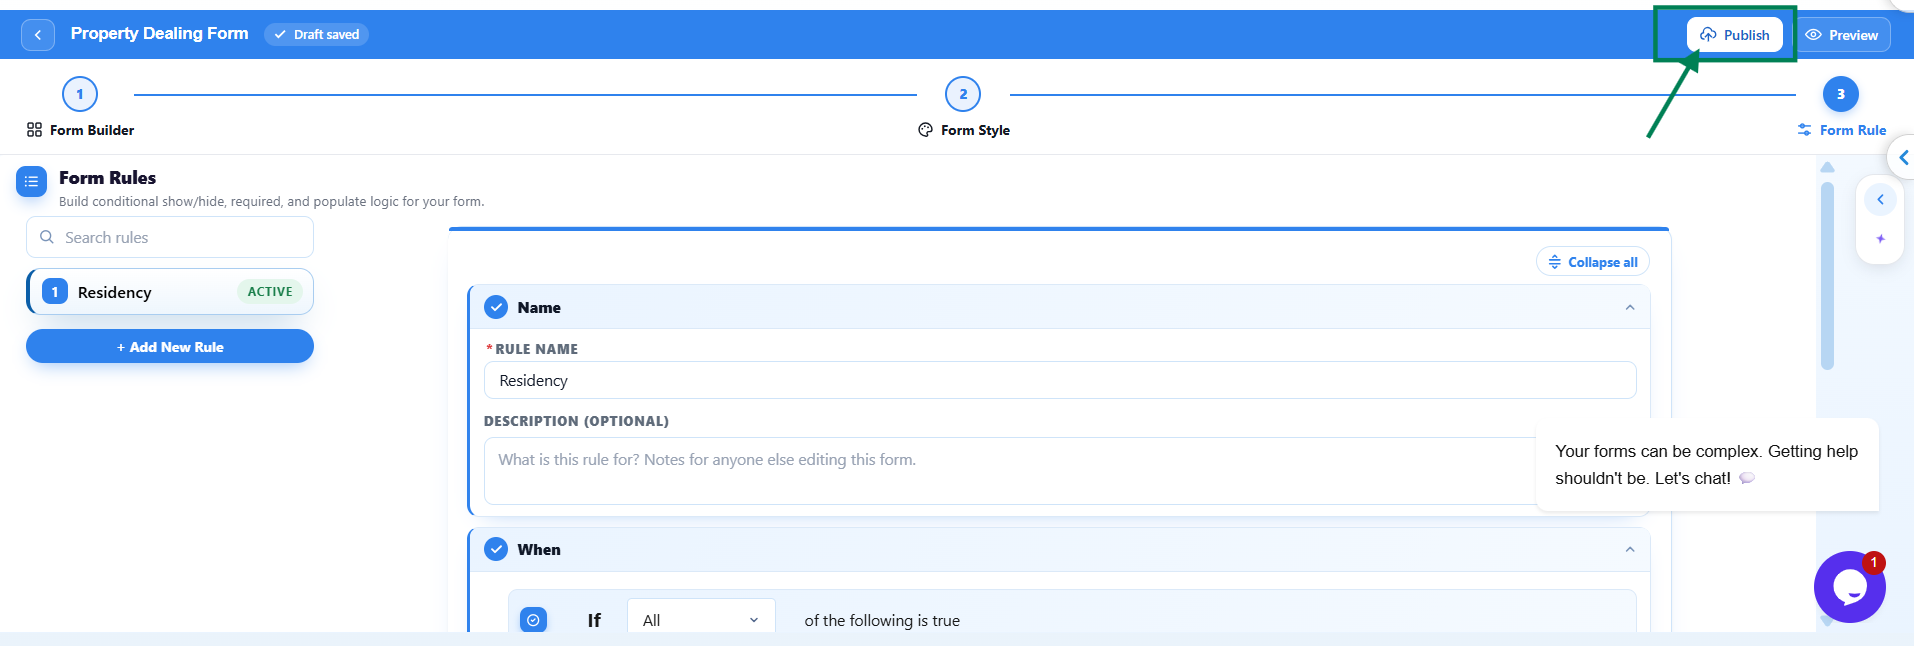
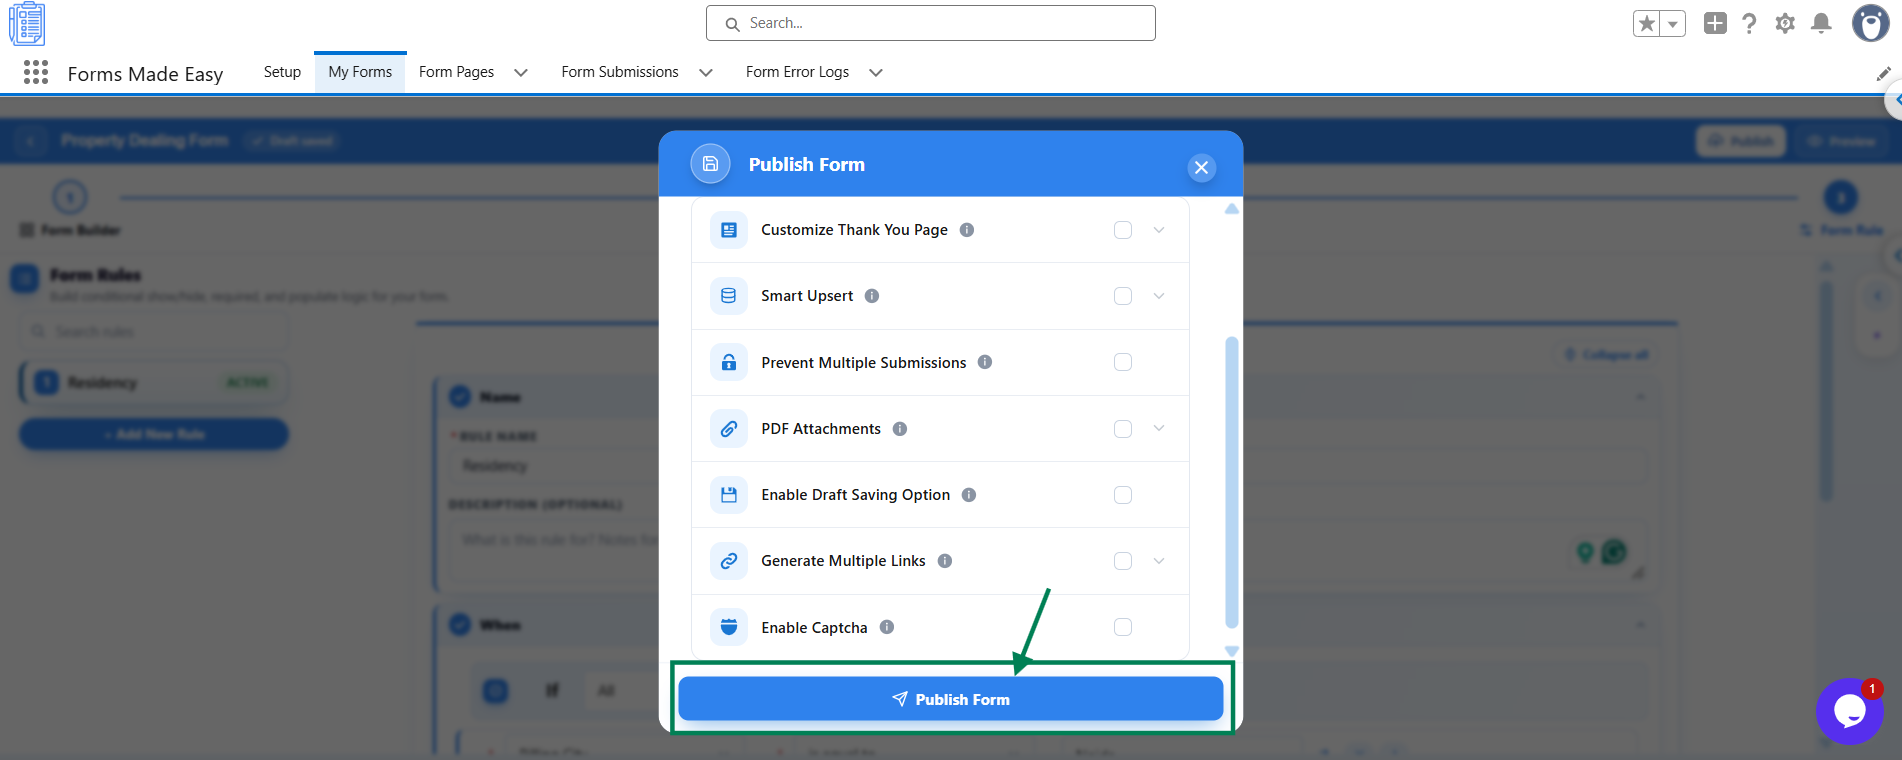
When ready, click Publish.
You can configure additional publishing options, including:
- Custom thank-you pages.
- CAPTCHA protection.
- One-time form links.
Click Publish Form to complete the process.
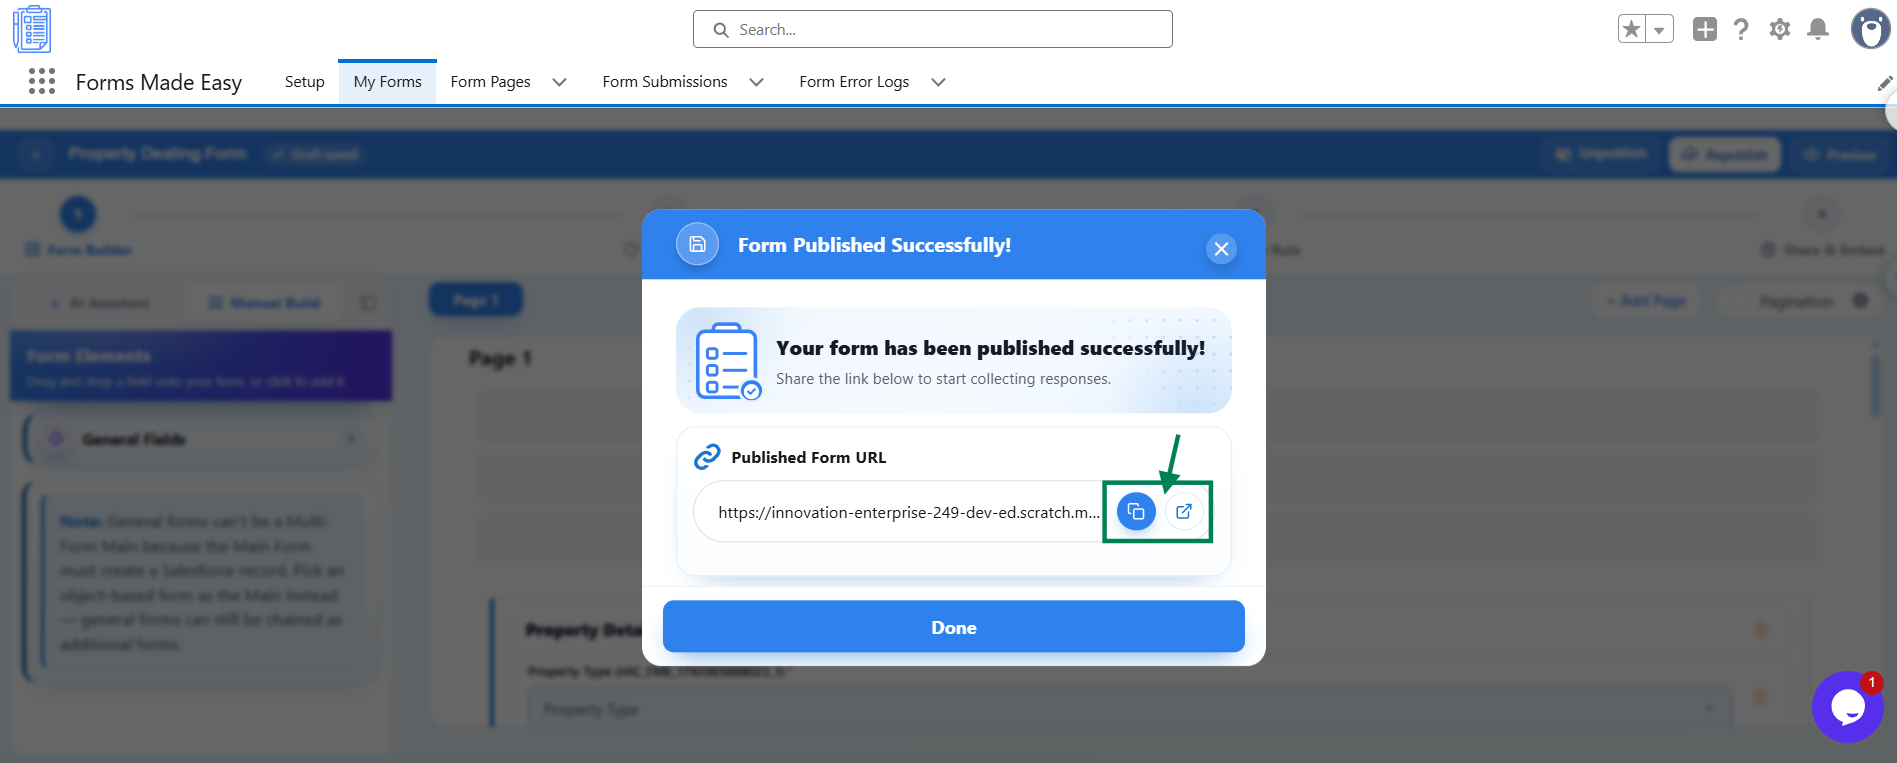
After successful publication, copy the Published Form URL or click Visit Form to access your live form.
Step 7: Share or Embed Your Form
Once published, Forms Made Easy provides multiple distribution options.
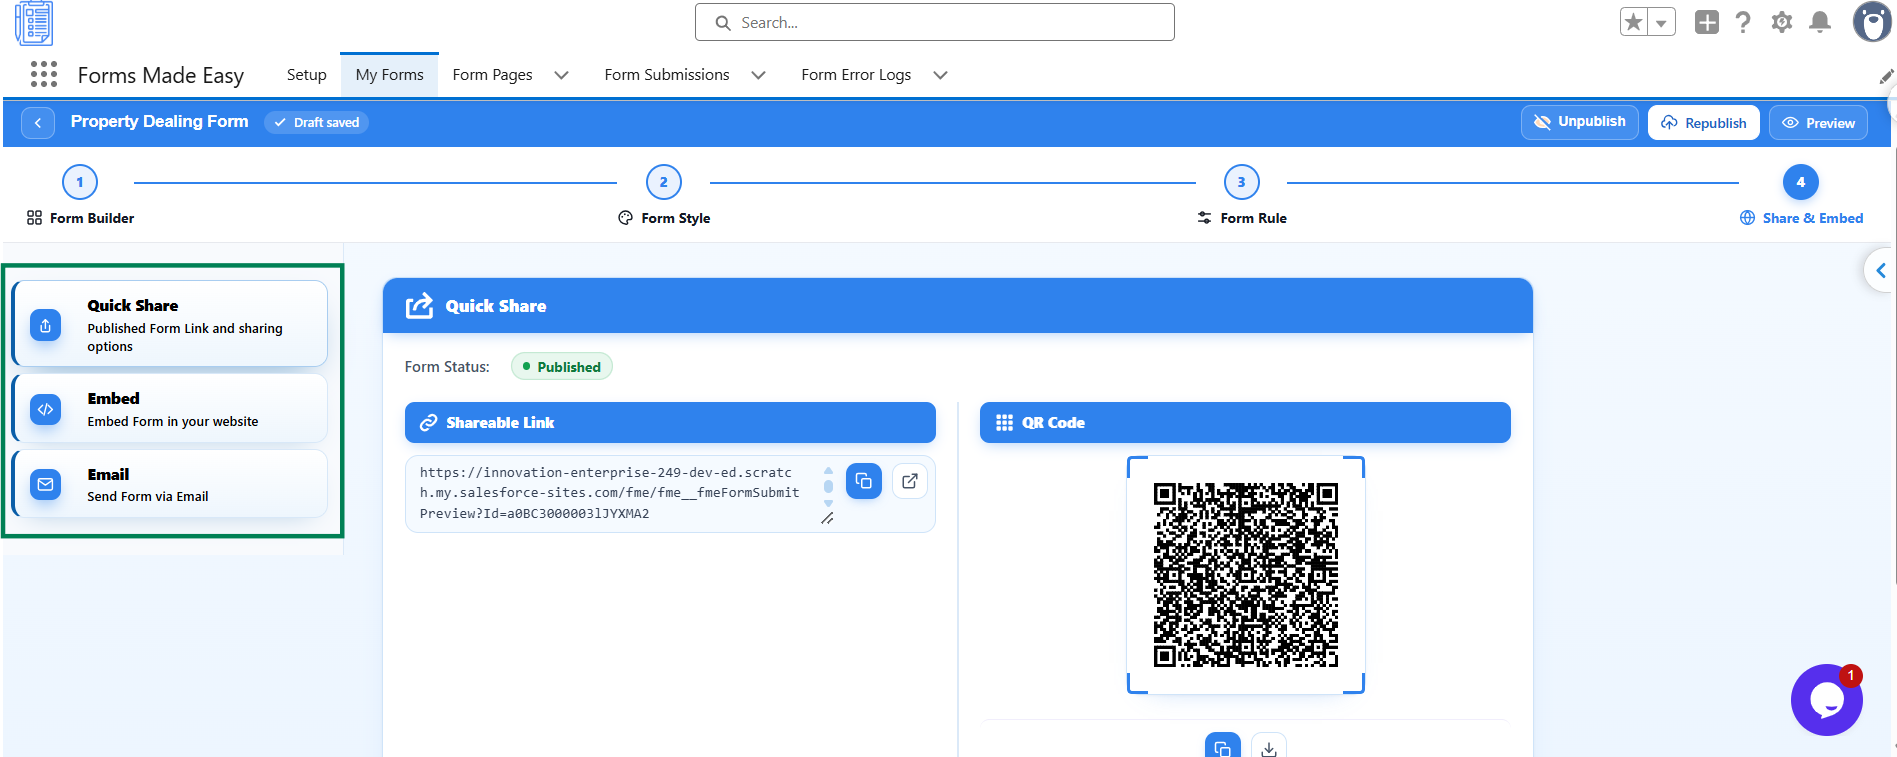
Navigate to the Share & Embed tab.
Quick Share: Copy the form URL or generate a QR code for convenient access.
Prefilled Links: Create links with information already populated from a selected Salesforce record.
Website Embedding: Embed forms using JavaScript, iframe, or Source Code.
Email Distribution: Send forms to individual Salesforce records or list views using merge fields.
Important: When embedding forms using Source Code, add your website domain under Salesforce Setup > CORS > Allowed Origins.
These options make Forms Made Easy suitable for Salesforce lead capture forms, customer surveys, event registrations, and website contact forms.
Step 8: Track and Manage Salesforce Form Submissions
Publishing your form is only the beginning.
Forms Made Easy lets you monitor and manage collected responses directly within Salesforce.
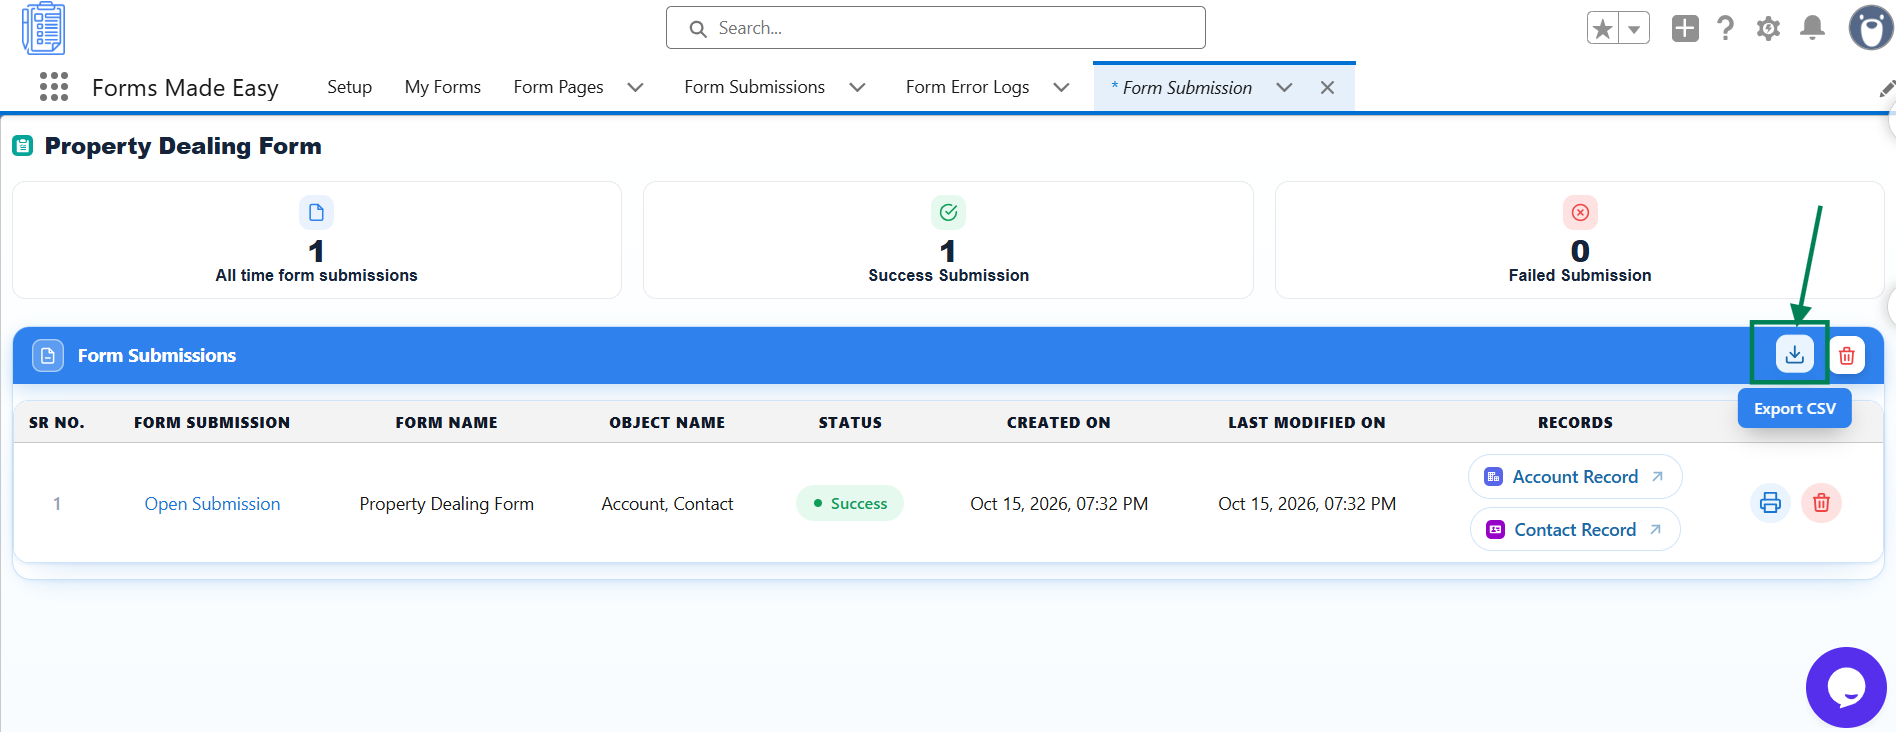
Navigate to My Forms and open the submissions associated with your form.
From the dashboard, you can:
- Monitor form visits.
- Review successful and failed submissions.
- View individual form responses.
- Access associated Salesforce records.
- Print submissions as PDFs.
- Export submission data as CSV files.
If a submission fails, open the Form Error Logs tab to investigate the issue.
This centralized approach simplifies Salesforce form management and helps teams keep track of incoming information.
Why Choose Forms Made Easy for Salesforce?
When evaluating Salesforce form builder apps, businesses often prioritize simplicity, customization, automation, and CRM connectivity.
Forms Made Easy combines these capabilities in a Salesforce-native application.
Whether you’re creating a basic contact form or an AI-generated form with conditional logic, the platform provides tools for managing the entire process.
Its combination of AI form generation, drag-and-drop customization, Salesforce data collection, responsive design, and flexible publishing makes it a practical solution for teams looking to streamline form-building workflows.
Final Thoughts
Building Salesforce forms doesn’t have to be complicated.
With Forms Made Easy, you can move from initial setup to a published form through an intuitive, no-code workflow.
Start with a template, build manually, or let AI generate your first form. Customize the experience, apply conditional logic, and manage every submission directly in Salesforce.
Ready to build your first Salesforce form?
Explore Forms Made Easy and discover how AI-powered, no-code form creation can simplify your Salesforce data collection workflows.